Sunday, March 7, 2021

Altenew Craft-A-Flower: Antique Rose Layering Die Set Release Blog Hop + Giveaway

Hello friends!  I'm so happy to be joining in the Altenew Blog Hop to celebrate the release of the gorgeous Craft-A-Flower: Antique Rose Layering Die Set!


You should have arrived from the amazing Erum Tasneem's blog!  If you need to start at the beginning, head over to the Altenew Card Blog!

I have always been amazed by Altenew's beautiful layering dies!  This is another one that is so much fun! Another thing I really love is that there are three ways to purchase the Antique Rose Layering Die Set!  You can purchase just the Layering Die Set, get it bundled with Altenew's Gradient Card Stock (which is excellent quality) or join the Subscription Plan to save!  Click the photos to get to Altenew's shop!


For my card, I decided to get a bit outside my comfort zone and create a rose with shades of blue using the Sea Shore Gradient Card Stock!


I followed the included layering guide for die cutting the flower layers.  For the leaves, I used Green Meadows Gradient Card Stock.  Following the layering guide, I adhered all of the layers together with liquid glue and set them aside to dry.

Next I used the Angled Mosaic 3D Embossing Folder with some 80# Neenah and cut it to 5-½" x 4-¼".  I adhered the embossed piece to a top-folding card base.  I totally love the dimension of this embossing folder!


I added foam squares to the back of the flower and adhered it to the card.  The leaves are adhered with foam squares or liquid glue.  Next I used a sentiment from the Tranquility Rose stamp set and stamped it in Versamark onto black card stock.  I sprinkled on some white embossing powder, heat set it, and trimmed it into a thin strip.  I used foam tape to adhere it and added a few coordinating gem crystals for a touch of bling!


I loved creating my card with the beautiful Antique Rose Layering Die and hope I've given you some inspiration!

Your next stop on the hop is the awesome and so talented Laurie Willison!

Giveaway Prizes!

$200 in total prizes!  Altenew is giving away a $50 gift certificate to 2 lucky winners and a $20 gift certificate to 5 winners!  Please leave a comment on the Altenew Card Blog and/or each designer's blog post on the hop list below by 3-12-2021 for a chance to win.  Altenew will draw 7 random winners from the comments left on each stop of the blog hop and announce the winners on the Altenew Winners Page on 3-15-2021.

Blog Hop List:

Altenew Card Blog

Norine Borys

Terri Koszler

Nathalie DeSousa

Tina Smith

Jaycee Gaspar

Verity Biddlecombe

Virginia Lu

Keren Baker

Emily Midgett

Michelle Short

Amanda Baldwin

Erum Tasneem

Carol Hintermeier << that's me!

Laurie Willison

Jenny Colacicco

Lilith Eeckels

Yoonsun Hur

LauraJane

Rachael Shedeed

Seeka

SathyaKala Sankaran

Wednesday, March 3, 2021

Bunny Shenanigans & Easter Egg Hiding at the House! | Honey Bee Stamps

 Hello friends!  Today I've used Honey Bee Stamps House Builder Card Base Honey Cuts to create my Easter themed card!  I've paired this with some of the products from the awesome Spring Bliss new release!  The bunnies have been having lots of fun hiding the Easter eggs all around!

Create the card base:

I die cut the other card elements from dies in the House Builder set.  Mostly I die cut them from white card stock and then colored them with my Copic markers.  The curtains are from gingham paper that's in my stash.  You can also use colored card stock as I did for the door and tiny flowers.

I die cut the Itty Bitty Eggs Honey Cuts from various colors of card stock from my scrap pile.  I added sparkle to them all with a clear glitter pen and Glossy Accents to four of the eggs.  I set these aside to dry.

Next I stamped the bunny face and backside in Copic safe ink.  These images are also in the Loads of Spring stamp set.   I colored them with Copic markers and die cut them with the coordinating Honey Cuts   However!  I decided to fussy cut them because none of the other images had a white border and I really like how it makes the bunny really stand out!

I began planning the placement of all of the cute images for the front of the house.  I used Bee Creative glue and foam squares to pop up some of the images.  I was careful to use the glue just along the bottom and/or sides of the shrubs so I could easily tuck the eggs and flower stems here and there.

Die cut the hinge in the House Builder die set and adhered the two house bases together.  I used 1/8" double-sided adhesive for a strong hold.


Here's a look at the inside of the card!  The sentiments in the Hoppy Easter set are just so fun!

The card looks so cute displayed standing up!


Did you notice the fluffy bunny tail?  I have some of those tiny pompoms in my stash, but they were still too large.  So I used some sharp scissors to trim one down and then attached it with glue.  A bit more cute factor!


How many eggs did you find?  I hope you found them all!  Haha!  Thanks so very much for stopping by!

Tuesday, March 2, 2021

Beautiful Wishes Birthday Card | Rubbernecker Stamps

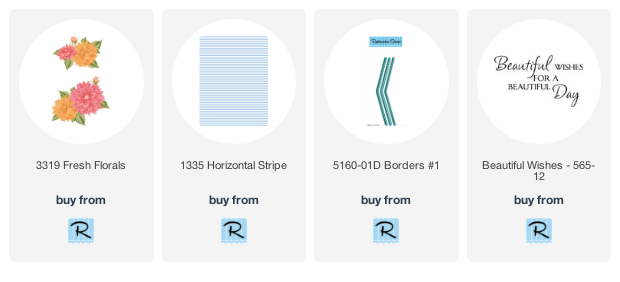
 Hello crafty friends!  Today I have a birthday card using just the outline stamp of Rubbernecker Stamps' gorgeous Fresh Florals layering stamp set.  I love layering stamp sets that have an outline stamp as it give you another way to stretch the use of your stamps!

I began by creating the card base:

  • Trim a piece of white card stock to 4" x 5-¼" and use Copic V05 to color the edges to create a coordinating layer.  Adhere to a white A2 card base.
  • Ink up the Horizontal Stripe background stamp with black ink and stamp onto white card stock.  Trim the striped panel to 3" x 5".
  • Next use a scallop border from Borders #1 to die cut white card stock.  Trim ¼" from each end.  Trim length-wise to 2-½" at the widest point.
  • Layer the scallop border piece over the striped card to create a 3-¾" x 5" piece. Adhere the pieces together with liquid glue.  Adhere to the card base.

Next stamp the outline layer of each flower in the Fresh Florals set in Copic safe ink.  I began by coloring the largest flower with the markers you see in the next photo.  I have found that when coloring detailed images like these flowers, it helps to start with the petals that you think will be easiest to color and start there.  Also, coloring one petal at a time helps and before you know it, you're done!

I colored the leaves with YG67, YG17, YG25, and YG03.  When I started with YG67, I colored over the black shadows that the stamp creates with YG67, extending just beyond the edges of the shadows.  I blended out with the other colors from there.  (I almost always go from darkest to lightest colors with my Copics.) 

Die cut the flowers and leaves with the coordinating dies.

Stamp the Beautiful Wishes sentiment with black ink on white card stock.  Next use the smallest Nested Oval Scallop die to cut it out.  Add thin foam tape to the back.

Next I arranged the flowers, leaves, and sentiment on the card.  When I had it how I liked, I adhered the small flower with liquid glue.  I added regular foam tape to the largest flower, and thin foam tape to the medium sized flower.  The three smallest leaves were adhered with glue and the other two with foam tape.

Of course, I always add a bit of bling whenever possible!  LOL!  I added dots of Lilac Whisper Nuvo Glitter Drops here and there around the flowers.


I hope I've inspired you to look through your layering stamp sets and find those that have the flower and leaf outline stamps!  Thank you so much for stopping by!


Monday, March 1, 2021

Altenew Build-A-Flower: Semi-Double Chrysanthemum Release Blog Hop + Giveaway

Hello crafty friends!  I'm so happy and thrilled to be joining the blog hop to celebrate the release of the gorgeous Altenew Build-A-Flower Semi-Double Chrysanthemum Layering Stamp & Die Set set!


You should have arrived here from Amanda Baldwin's blog.  If you need to start at the beginning, head on over to Altenew's Card Blog.

This layering set features a beautiful 4-layer chrysanthemum and three 3-layer leaves to add to your handmade cards, scrapbook layouts, bullet journal pages, and other DIY paper crafting projects.  The Build-A-Flower Semi-Double Chrysanthemum special edition stamp and die set is only sold as a bundle.   You can find this beautiful set in Altenew's shop with three choices to purchase and save!  Click the images for more details!


Just so you know, I have loved Altenew's layering stamps for many years!  In fact, theirs are the first layering stamps that I bought.  For my card I created, at least for me, a clean and simple design!


I used inks from Altenew's Tea Party Crisp Dye Ink Mini Cube set to stamp the flower.  The included layering guide makes this very easy!


For the leaves I used inks from the Green Fields Crisp Dye Ink Mini Cube set.  I die cut the flower and leaves with the coordinating dies.  I added foam squares to the back of the flower.  Then I stamped the sentiment onto black card stock with clear embossing ink.  I sprinkled on Rose Gold Crisp embossing powder and heat set it.  I hand trimmed the "love" sentiment and added small foam squares to the back.  I used my paper trimmer to cut the rest of the sentiment into a strip and added foam tape to the back.  After I added a few thin black card stock strips to a top folding A2 card base, I adhered the flower, leaves, and sentiments.  A few black enamel dots adds a bit of bling!


I hope I've inspired you with my clean and simple card using this absolutely gorgeous set! Thank you for hopping!

The next stop on the hop is the amazing Dana Joy!

Here are the hop details:

Giveaway Prizes:

$200 in total prizes!  To celebrate this release, Altenew is giving away a $50 gift certificate to 2 lucky winners and a $20 gift certificate to 5 winners!  Please leave a comment on the Altenew Card Blog and/or each designer's blog post on the hop list below by March 7, 20201 for a chance to win.  Altenew will draw 7 random winners from the comments left on each stop of this blog hop and announce the winners on the Altenew Winners Page on March 9, 2021.

Blog Hop Order:

Altenew Card Blog

Virginia Lu

Nathalie DeSousa

Laurie Willison

Amanda Baldwin

Carol Hintermeier << that's me!

Dana Joy

Jenny Colacicco

Katrina Howe

Keren Baker

LauraJane

Michelle Short

Rachael Shedeed

SathyaKala Sankaran

Seeka

Terri Koszler

Verity Biddlecom

Wednesday, February 24, 2021

Missing You Friend! | Honey Bee Stamps

 Happy Wednesday my friends!  How many friends do you need to send a "missing you" card to?  If you're like me, that would be a lot!  My card today is just what we need!  I've used Honey Bee Stamps beautiful Pretty Postage stamp set and coordinating Honey Cuts for this quick and easy card.  Except for the time it took to color the image, this card came together in a snap!  Read on for the details!


I began by creating my card base.  I used the new Quatrefoil A2 Cover Plate Base die to cut the purple paper from the Playful Pastels 6x6 paper pad.  There are so many gorgeous papers in this paper pad!  Then I used the Quatrefoil Cover Plate Top to die cut some 80# white card stock.  I adhered the layers together with Bee Creative glue and adhered the panel to a top-folding A2 card base.

Next I stamped the Pretty Postage image with Copic safe ink and colored it with my Copic markers.  I colored the flowers with these Copic markers:  RV25, RV14, RV13, RV21, and RV10.  For the leaves I used YG67, YG25, YG03, G28, G07, and G09.  The envelope liner is colored with Y15, Y13, Y11, Y00 and the shadows on the white envelope are C03, C01, and C00.  When I finished I thought the yellow was a bit too bright.  So I was brave (Haha!) and added shadows around all of the leaves and flowers that are over the liner with C2, C0, and C00.  I know it still looks bright, but the yellow is definitely toned down from what it was!  I used the coordinating Honey Cut to die cut it out.

I decided that I wanted all of the white edges around the image to blend in more with the background paper.  So I found a few Copic markers that coordinated nicely with the paper.  Those markers are V25, V22, and V20.  When I finished the shading, I used a #10 and #05 white gel pen to add white dots to the background and to the flower centers.

I stamped the sentiments, that are also in the Pretty Postage set, with black ink.  I die cut the sentiments with the coordinating Honey Cuts.  I added foam tape to the back of them and adhered the pieces to the card front.  I added just a few bits of bling from the Playful Pastels Gem Stickers.


This card was so fun to make!  I will be using the A2 Quatrefoil Cover Plate dies a lot--I think they are so beautiful!!!  Thank you so much for stopping by today!  Stay crafty!

Supplies:

Friday, February 19, 2021

So Hoppy - Honey Bee Stamps Spring Bliss Instagram Hop

Hello friends!  I'm so happy you've hopped over here from the Honey Bee Stamps Spring Bliss Instagram hop!  For my card today, I've used the new Loads of Spring stamps and coordinating Honey Cuts that were created to coordinate with the Big Pickup Cab and Big Pickup Tailgate sets.  I love these and, as you can see, they are so versatile for any occasion!


I'm going to keep my card descriptions brief so you can get back to the hop!  I made my card using both the Big Pickup Cab and the Big Pickup Tailgate for a double-sided card!  When you die cut the two, they are mirror images that can be adhered at the top by creating a simple little hinge.


I stamped all of the images with Copic safe ink onto 80# Neenah solar white card stock.  Then I colored them with my Copic markers.  I used the coordinating Honey Cuts to cut them out.  I have all of the supplies listed below with links for you to check them out!


I stamped the sentiment from the Hoppy Easter set onto 80# Neenah, first with Carved Pumpkin Distress Oxide, then with Versamark clear ink.  I sprinkled on clear embossing powder and heat set it.  Next I die cut it with the coordinating Honey Cuts.


Here are the views of the front and back (or is it the back and front? Haha) of the card.


There are so many awesome new sets in the Spring Bliss release!  You can click that link to see it all.  I sure thank you for stopping by and hope you will leave a comment for me over on Instagram!  Be sure to check out all of the hop links and comment for your chance to win one of two $25 Honey Bee gift cards!

Supplies:
Versamark clear ink
WOW Clear embossing powder

Rubbernecker Stamps Springtime Fun Release Instagram Hop

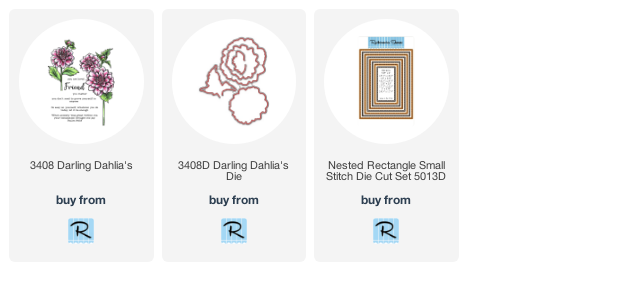
Hello friends!!  Thank you for coming from the Rubbernecker Stamps Springtime Fun release Instagram hop to check out my card today!  I've used the absolutely beautiful new Darling Dahlias stamp set for my card today.  This set has three gorgeous Dahlia flower stamps, two buds, leaves, and some awesome sentiments!  There's also a coordinating die set that I didn't use today.  I absolutely love this set!


I began by stamping the large Dahlia with Copic safe ink onto Neenah Solar White 80# card stock.  Next I stamped it onto some masking paper and fussy cut it out.  I placed the mask onto the stamped image and stamped the smaller flower, the bud, and the stem.  I stamped the leaves, and stem, and also a mask for one of the leaves.

Then I stamped the other leaves, placing the mask for the stem over the stem for the smaller flower.  I stamped the other leaves and then saw my boo-boo!  Do you see it?  Probably not until I mentioned it, right?  That is why I never give up on a card!  Especially after the stamping and masking I did!

I colored the flowers and leaves with Copic markers, which I've listed at the end.  When I finished coloring the flowers, I die cut the panel with the largest Nested Rectangle Small Stitched die.  Next I adhered it to an A2 sized pink card stock layer and added this to a top-folding card base.

Next I heat embossed the sentiment in gold onto heavy weight vellum and trimmed it into a banner shape.  I rolled up small glue dots and place under the embossing and adhered it to my card.


To finish up, I added some gold Nuvo drops around the arrangement.


I sure do thank you for stopping over to take a look!  Be sure to go back to my Instagram feed to continue on the hop.  Be sure to comment and tag friends for more chances to win!  

Copic markers:
flowers: RV25, RV23, RV21, RV10
leaves:  G07, YG17, YG25, YG03

Other supplies:

Shop the Rubbernecker products here: