Sunday, December 29, 2024

Sweet "Love You" Stitched Card

Hello crafty friends!  Well, evidently December got the best of my schedule!  LOL!  I totally spaced on photographing and sharing this card I made with Spellbinders' December Stitching Die of the Month!

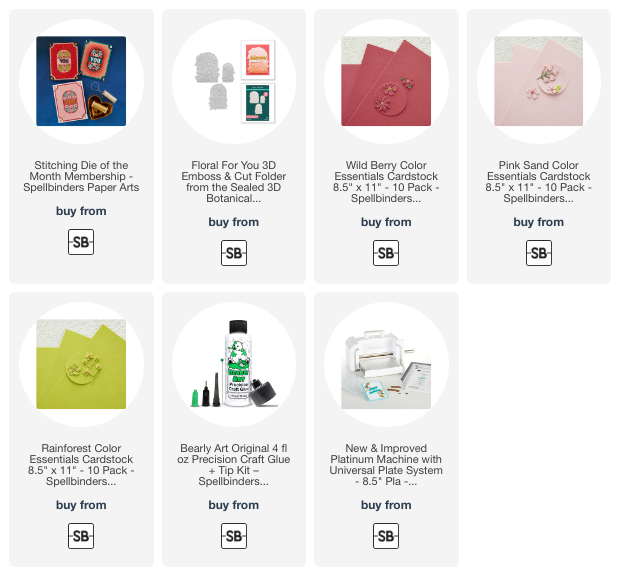
The large panel die of the Stitched Notch Corner Card (December Stitching Die) was die cut from Wild Berry cardstock.  I did the super easy stitching with DMC 335.

I die cut the letters, flowers and leaves dies from Wild Berry, Pink Sand, and Rainforest cardstocks.  I have all of the cardstocks linked in the list below.

I stitched the flowers with the same DMC 335 thread.  I die cut the solid flower die twice more for the four flowers in the corners.  I used a ball tipped stylus to add shape to the flowers.

I die cut white cardstock with the outer die from the Stitched Notch Corner dies and then decided I wanted and embossed texture in the center of the stitched panel.  Looking through my embossing folders, I saw the gorgeous Floral For You 3D Emboss & Cut Folder (embosses and die cuts in one pass!) and knew the middle sized one would be perfect!  (I just saw that this set is currently ON SALE at a fabulous price as of this date.)

Have you checked out Spellbinders' Club Kits?  There is truly something for everyone and it's a great way to try something new for 2025.  Good to know:  You can cancel any time.  The window for signing up for the Club Kits reopens on January 6!

Thank you for using my affiliate links to shop (never any additional cost to you)!

Wednesday, December 25, 2024

Wishing You Much Joy, Love & Peace!

Merry Christmas, friends! Today I'm sharing a beautiful card I made for this Christmas day using Honey Bee Stamps' Artsy Angel stamps and Honey Cuts, along with the newer Floral Noel stamp set and coordinating dies.

I stamped the beautiful Artsy Angel first with No Line Coloring ink using my MISTI onto a panel of white cardstock. I left the stamp in the MISTI and colored the angel with some Copic markers.

Then I placed the panel back into my MISTI and treated it with an anti static powder. Then I inked up the stamp with Clear Embossing ink. I stamped it a few times to be sure to get good ink coverage, then I poured some gold glitter embossing powder (one I've had in my stash quite a while) and heat set it using my heat tool.

I cut the Angel out with the coordinating die and set it aside to work on the background panel.

I wanted a kind of aura of light behind the angel, so first I used blending brushes to add Antique Linen and Scattered Straw Distress Oxide inks in the center of an 80# white cardstock panel in a triangle pattern.

Then I blended Prize Ribbon, Chipped Sapphire and a bit of Black Soot Distress Oxide inks around the edges.

Next I added some diluted gold paint splatters with a paint brush to the background. After it dried, I used glue to adhere it to an A2 card base.

For the sentiment I used the Joy and the sub-sentiment from the Floral Noel stamp set. I heat embossed both on a dark blue cardstock with the same gold glitter embossing powder. I used the coordinating die to cut out Joy and trimmed the other sentiment into a banner with fish tail ends.

The Artsy Angel is popped up on the card with foam dots. Do you ever cut your foam dots into little strips? That's what I did for the sentiment! I just added a few strips to the top of the "j" and the "y" and added glue to the right side of the "o" to adhere it. More glue adhered the banner sentiment.

TIP: Does your white foam stand out sometimes on a dark background? I used a dark blue Copic marker to color the sides of the foam tape so it doesn't show! Try it!

Whatever holiday you celebrate this season, I wish you all the joy, peace, and love today and all of the next year! See you in 2025!!

Thank you so much for choosing to use my affiliate links to shop (never any additional cost to you)!

Sunday, December 22, 2024

Quick and Easy Holiday Gifts Tags

Three days until Christmas!  Hello, crafty friends!  If you need some quick and easy coordinating gift tags, I have just the plan for you.  As we are all short on time, I will direct you to the blog at Brass & Bliss for all of the details.

I love how these turned out, and seriously, I made these 6 tags in about an hour or so!

I'm just going to share a list of the products I've used, as I still have LOTS of wrapping to do today!  Can you relate?  LOL!

These products are all available over at the Brass & Bliss website:

 Holiday Tags Die

 Holly and Berry Stencils

Crimson ink (Color Fuse Set #4)

36010 Winter Wreath stamp set

Moss ink, Basil ink (Color Fuse #10)

I really hope you will join me over on the blog at Brass & Bliss for all of the process photos with lots more details!

I always so appreciate you stopping by!

Wednesday, December 18, 2024

Gingerbread Lane Christmas Card

Hello crafty friends! Can you believe it's only one week until Christmas?! I absolutely love making Christmas cards and just had to share another one with you that features the beautiful Lovely Layers: Alice's Gingerbread Lane Honey Cuts.

I went all out on the sparkles for this card! Haha! I die cut the pieces for the gingerbread house #2 from the Lovely Layers: Alice's Gingerbread Lane dies. These were cut from white and brown cardstocks. I decided on a white iced gingerbread house with peeks of the gingerbread. The other layers are die cut from red and silver glitter paper that I have in my stash.

I also die cut two of the trees from brown and white cardstocks. The green tree is paper that I inked up with Bundled Sage Distress Oxide ink.

Then I used the Layering Guide to assist me as I glued the layers of the Gingerbread House together with Bee Creative glue. Be sure to also use your reverse tweezers and glue with a fine tip to make the layering lots easier.

While the glued layers were drying, I layered my A2 card base with more silver glitter cardstock and then a 4" x 5-¼" panel that I embossed with the gorgeous Snowflakes 3D embossing folder.

I hand trimmed more silver glitter cardstock into a hill for my scene. I used glue to adhere the Gingerbread house and foam dots (cut smaller with scissors) to adhere the trees.

I stamped a sentiment from the Wonder of Christmas stamp set in black ink. Then I cut it out with the coordinating dieand popped it up on the card with foam tape strips.

I decided I want a bit more sparkle and added three Layering Snowflakes that I had saved from another project.

I love all of the sparkles, and hope you do too! Thank you for stopping by and enjoy your week leading up to the holidays!

Thank you so much for using my affiliate links to shop (never any additional cost to you)!

Sunday, December 15, 2024

You Are Always On My Mind Stenciled Card

Happy Sunday crafty friends!  I'm sharing photos of my card I made for Altenew's December 2024 release Instagram hop.  There's still time to head over to my Instagram and leave comments on the hop (until December 18) for your chance to win an awesome prize!

This card features the new and so beautiful Build-A-Garden: Dreamy Dahlias set!

I used all of the inks in the new Sweet & Serene Fresh Dye Ink bundle, plus the green inks in the Green Valley ink bundle with the stencils in the Dreamy Dahlias bundle to color the flowers and leaves.

The sentiments I used are two of several included in the Dreamy Dahlias stamp set.  The larger sentiments also have coordinating dies in the Dreamy Dahlias Add-On die set.

Join me over on Instagram to watch me make this beautiful card!  Have a wonderful day!

Thank you for choosing to use my affiliate links to shop (never any additional cost to you)!

Wednesday, December 11, 2024

Santa Is Coming Down The Chimney Holiday Card

 Hello crafty friends! Today I'm sharing my interactive card featuring Honey Bee Stamps' Lovely Layers: Fireplace with the Lovely Layers: Fireplace Add-On Honey Cuts. Santa is swinging on down the fireplace in this cute scene! I love these sets because I can create any color of theme and also use the "fire" dies for the fireplace too!

I first created my 5" x 7" card base and added a white cardstock layer that I embossed with the Wood Planks 3D embossing folder. I trimmed 1-¼" off of the bottom before adhering it to the card with glue. I stamped the sentiment from the Sending Christmas Joy stamp set onto a 1-¼" x 5" strip of white cardstock in black pigment ink. I adhered this to the bottom of the card and glued on a strip of dark gray cardstock just above it.

Next I die cut the Lovely Layers: Fireplace dies from three shades of gray cardstock. I used the Layering Guide to help me in assembling the fireplace layers with glue. I did not adhere the inner fireplace brick piece at this time.

Then I die cut the desired pieces from the Lovely Layers: Fireplace Holiday Add-On from green, red, white, brown, and black cardstock. I, again, referred to the Layering Guide as I glued the pieces together. I added some sparkle to the lights with a clear glitter pen.

Next I worked on the interactive portion of the card. I will do my best to explain it here, but I will have a reel posted over on my Instagram soon where you will get a visual of how I made this. Here are the steps for the interactive portion:

  • Using the completed fireplace as a guide, I used a pencil to trace the opening onto the card.
  • Then I adhered a piece of dark gray cardstock that is larger than the tracing.
  • Still using the fireplace as a guide, I added glue to the back of the brick insert and glued it to the dark gray piece.
  • Next you will need a circular, dimension piece for the swinging portion. You can use a penny, or die cut/punch several small circles (no larger than ¼" and adhere them together. It just needs to have a bit of height for the Santa to swing.
  • First cut a strip of cardstock that is a bit wider than your chosen circular piece and is about 1" to 1-½" long.
  • Adhere your dimensional circle to the card with a small piece of strong double-sided tape. Then I used my anti-static tool on the adhesive that is around my dimensional circle so that the Santa piece will not stick to it.
  • Now you will need to trim a piece of cardstock that is a bit wider than your dimensional circle and about an inch or so long. Punch a hole that's a bit wider than your dimensional circle near the top of the strip.
  • Glue this strip to the back of the Santa.
  • I placed a piece of removable tape onto the front of the Santa and fireplace to hold him in place.
  • Then I added thick foam dots to the back of the fireplace to adhere to the card and removed the temporary tape.

I finished up the card by placing the other elements of the scene around the fireplace. I used glue and more thick foam dots to adhere them.

If I decide to mail this card I will used a padded envelope. It will be a bit more postage but I think this card is worth it!! If you have any questions about how to make this fun swinging Santa card, please leave me use the "contact me" form in the left column, and I will be happy to help.

Thank you so much for stopping by today! Have a wonderful day!

Thank you for using my affiliate links to shop (never any additional cost to you)!

Monday, December 9, 2024

Three Quick and Easy Holiday Gift Tags

 Hello crafty friends!  Today I'm over on Brass & Bliss' blog to share all of the details of these three beautiful gift tags.

What made these so easy to make is I just used two colors of cardstock, used the same tag die for them all and the same Kittle Says Christmas stamp set for all of the sentiments.  First I die cut kraft cardstock three times with the largest Holiday Gift Tag die.  Then I add white paint splatters to all three.

This tag features the Greenery Wreath w/Flowers die and a sentiment from the Kittie Says Christmas stamp set.  It's finish with red gems and a gingham ribbon.

I die cut a few different snowflakes from the Large Snowflake die set for this tag and added silver gems for some sparkle.

This final tag features the beautiful Large Stacked Poinsettia dies.  I used a round tipped stylus to add shape to the petals before gluing the layers together.  It's finished off with gold gems and twine from my stash.

If you would like to see more details of how I made these, be sure to head over to the Brass & Bliss blog!  Thank you for stopping by!