Monday, April 13, 2020

Sweet Friendship | Art Impressions

Happy Monday my friends!  Today I have a sweet card using the Art Impressions' for Scrapbook.com Exclusive Cherry Set.  I used just one of several of the beautiful images you get in this set and can't wait to use the others soon!


I stamped the image in Copic safe ink and colored it with the Copic markers listed below.  Then I fussy cut it out.  


Next I used the largest die from the Rectangle Double Stitched die set and cut out a panel of white card stock.  I layered that onto some red card stock and added it to a top-folding A2 card base.  I cut a piece of black card stock to 2-¼" x 5-¼" and added a piece of gingham patterned paper to that.  I added a thin strip of the red card stock to the right. 

Next I used a sentiment from the set (there are four more in this set!) and stamped it in Versafine Onyx Black ink.  I added foam tape to the back of the cherry image and adhered it to the card.


I love how the black and white gingham sets of the bunch of cherries!  I sure appreciate YOU, sweet friends, for stopping by today!  I hope you are safe, well, and that you have a great week.  Stay crafty!


Copic markers:
R39, R27, R24, R22, R20,
YG97, YG95, YG93, YG67,
YG17, YG25, YG23, YG03, YG01

Supplies:

Sunday, April 12, 2020

Birthday Card with Dimensional Flowers | Rubbernecker Stamps

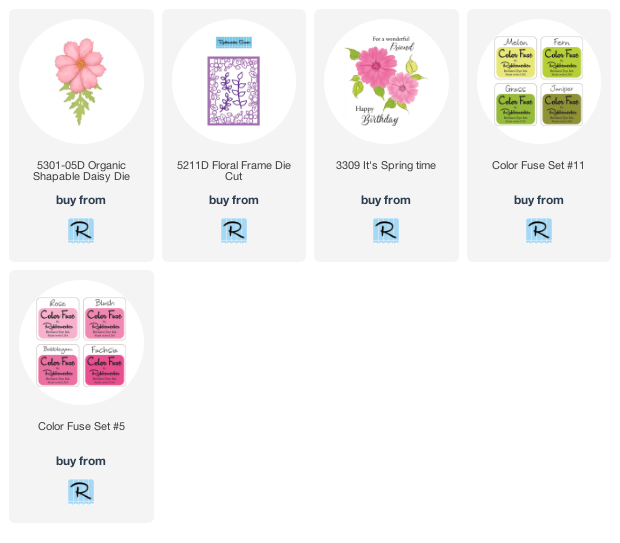
Hello friends!  I sure hope that today finds you safe and well.  Today I have a cheerful birthday card that I hope will bring a smile to your face!  I love creating dimensional flowers and just look at the size of these flowers made with the beautiful Organic Shapable Daisy Die!


Here are my steps to create the card base:

  1. Die cut two of the Floral Frames.  Adhere them together with liquid glue and let dry. (I didn't think of it before I die cut these, but I wish I had thought to use a sheet of Stick-It to adhere them!  Maybe next time.)
  2. Adhere the Floral Frame die cuts to a top-folding A2 card base.

For the flowers:

  1. Die cut a set of petals for each flower from white, light pink, and pink card stock.
  2. Brush on a bit of pink ink from the Color Fuse Set #5 for shading.  I used a small ink blending brush to do this.  Test the pink shades on scrap pieces to decide which will work best for your particular shade of pink card stock.
  3. Die cut four of the leaves.
  4. Ink some shading onto the leaves with green ink from the Color Fuse Set #11.
  5. Using a ball tipped stylus and a foam mat, press the stylus onto the back of each petal to create a rounded shape.
  6. Flip the petals over and press the stylus into the petal centers.
  7. Adhere the three petal pieces for each flower by adding a dot of glue to the center and stacking one on top of another.
  8. Die cut the flower stamens from yellow card stock.  I used two stamens per flower.
  9. Shape the stamens with a ball stylus by pressing the stylus on the back side first.  Flip it over and press into the center to create a cup shape.
  10. Adhere two stamens for each flower and then glue them to the flower centers.
  11. Add a good sized drop of glue to the center of the flowers and sprinkle in some yellow Mini Prills.
  12. Adhere the flowers to the card base.  I used glue dots for two of them and two stacked 3D foam squares for the middle flower.
  13. Adhere the leaves with liquid glue.  I snipped the branches as needed to fit into the arrangement.


I was having so much fun creating and arranging the flowers onto my card base, I kind of forgot about the sentiment! LOL!  I used a sentiment from the It's Spring Time set and stamped it in black ink.  Then I just fussy cut it and popped it up with thin foam squares.

I think all birthday cards should have a bit of sparkle, so I added some glitter onto the flower petals.  If you have a fine tip on your glue bottle, you can get just a fine line of glue to sprinkle the glitter onto.


I hope this card gives you inspiration to give these shapable dies a try!  Thank you for stopping by.  I hope you have a wonderful week!

Supplies:
Altenew Gradient Cardstock Sets: Red CosmosGreen MeadowsSummer Afternoon

Monday, April 6, 2020

It's A Girl.....& Boy!! | Art Impressions

Happy Monday friends!  Today I have a sweet card using Art Impressions Baby Girl and Baby Boy sets.  Be sure to keep reading to find out how I fixed two pretty big oopsies!  I decided to make a slimline card using the clothes on the line stamps from both sets to make a card to welcome twins!


I created a slimline card base by cutting some Neenah Solar White to 7" x 8-½" and scoring at 3-½".  I positioned both clothesline stamps and stamped them with Copic safe ink.  Next I stenciled the clouds with Distress Inks.  I really didn't want to create masks for all of the little clothes, so I just tried to go lightly with the ink blending brush around them.  I have a tiny blending brush that helped with that too.  I knew my coloring would cover any of the clouds I might get on the clothes.


I colored the clothes with the Copic markers listed below.  Then I stamped the sentiments Girl and Boy.  I had thought to color them like translucent balloons, but let me tell you, that was a HUGE fail! Haha!  So I re-stamped them onto scrap paper that I Copic colored in ombre shades of pink and blue. I fussy cut them out then went around the edges with a Memento Tuxedo Black pen to give them a finished look.  Then I adhered them over my "bad" balloons!  I rummaged through my stamp stash to find the ampersand and "It's a" sentiments.

Another BIG goof happened right after I finished coloring the little clothes.  I got up to do something else and when I came back I saw the card sitting ON TOP OF the open Distress Ink pad!!  Gah!  A big blue blob had seeped through to the front!  Hence, the birds.  As it turns out, I love having the birds holding the clotheslines!  Happy accident!

To finish it all off, I used a white gel pen to add doodles to the clothes and highlights on the sentiments.


I hope you've enjoyed my card today and that I've shown you that most times, those oopsies can be fixed!!  Thank you for stopping by today.  I hope you have lots of crafty time this week and that you and yours are well and healthy!


Copic markers:
B00, B000, BG01, BG02, C3, C1, C00, E31, E34,
RV00, RV02, RV10, RV13, RV52, RV63,
Y13, Y15, Y18, Y19, YG11, YG13, YG17

Supplies:
Art Impressions:  Baby Boy Set, Baby Girl Set,
Woodland Tree Cubbies (for the birds)
Distress Inks:  Tumbled Glass, Spun Sugar

Thursday, April 2, 2020

Easter Sweet Treat Box | Honey Bee Stamps

My project today features the adorable, and so versatile, Sweet Treat Box Honey Cuts.  I love how this box is so cute and can be used for any occasion for a tiny gift or treat!


I began by die cutting two each of the box dies from the Sweet Treat Box and one of the bottom from yellow card stock.  I added double-sided tape to each of the tabs.  Before assembling, I worked on the little scene for the front of the box.


For the eggs, I used the single egg from the Spring Chicks set.  I stamped out six onto white card stock.  The gingham eggs were stamped with the Bitty Patterns stamp and Distress Oxides in Wilted Violet, Mowed Lawn, Mermaid Lagoon, and Squeezed Lemonade.  The other two are stamped in the same colors using two of the stamps from the Background Builder stamp set.  Next I fussy cut them all out.  I decorated two of the eggs with Crystal Gem Stickers from the Perfect Petals and Ocean Breeze packs.

Next I die cut the scallop rectangle from the Sweet Treat Box Honey Cuts.  I used Tumbled Glass Distress Oxide, a Detail Blending Brush, and the cloud stencil from the Outdoor Scene Builder stencil set to add some clouds.  Then I die cut green card stock with the Grass Border die two times.  I layered the strips of grass and die cut them with the scallop rectangle die.  I popped up the shorter one with foam tape and adhered it to the taller piece and adhered both to the scallop rectangle.


Then I arranged the eggs and adhered them with a bit of liquid glue.  I stamped and colored the bees and butterfly from Bill The Bear set and die cut them with the coordinating dies.  I popped up one bee and the butterfly with a small foam square and added them to the little scene.  I added some little clay flowers and ribbons from my stash to tie the box closed.  These little flowers are actually in the Treat Shoppe Clay Bits embellishments.  I added a tiny drop of Nuvo Crystal Drops in Ripened Pumpkin for the flower centers.  I stamped the sentiment from the Sweet Treats stamp set in black ink and die cut it with the dies from the Sweet Treat Box Honey Cuts.  I popped it up with foam tape and adhered it to the top flap.  With the scene finished, I removed the tape liner from the tabs and assembled the box.

This box really holds a good amount of treats!  I could have put another egg in, but I had a lot of Easter grass in there too!


How fun is this?!!  What fun treat would you put in your box? I hope you all are well and finding some stress relief through your crafting!   I really appreciate you stopping by today!  


Supplies:
Honey Bee Stamps:
Bill The Bear stamps & Honey Cuts (bees and butterfly)
Crystal Gem Stickers:  Perfect Petals, Ocean Breeze

other supplies:
Distress Oxide inks:  Tumbled Glass, Squeezed Lemonade,
Mermaid Lagoon, Wilted Violet, Twisted Citron, Mowed Lawn

Stop and Smell The Flowers | Ai "Bloom Where You're Planted" Challenge Week 2

Hello friends!  It's week two of Art Impressions Bloom Where You're Planted challenge.  For my inspiration card I've used the newly released, and on sale, WC Large Cabin set.  Be sure to check out all of the new release at 20% off and the sale category where some awesome sets are up to 30% off!!


I watercolored this scene the "Art Impressions' way".  I'm not going to go through the "how to" for my card as you will find so much information on Art Impressions' YouTube channel.  All of the watercolor markers I used are Tombow's and the colors I used are in the supply list below along with the other stamp sets I used.  I did use several stamp sets, but it really wasn't necessary as all of the sets are so versatile.


I first inked up the cabin in blue and brown and stamped it onto Canson watercolor card stock.  This next photo shows my project in the early stages after I painted color on the roof and added blue to the window panes.  I used the tiny grass for the green part of the flowers in the window boxes.  I used a pencil to very lightly sketch in lines for the hill behind the house and added color to the hill and sky.


When my panel was dry, I used a Rectangle Double Stitched die to cut it out.  I then stamped the sentiment in black ink in the lower right corner.


I really had fun adding all the flowers and blooms in the trees!  I hope you are seeing the beautiful signs of spring where you are and that you are well and safe!  Thank you for stopping by.  I sure hope to see your entry in the Bloom Where You're Planted challenge!


Supplies:
Art Impressions:
4868-WC Flower Set 2 (yellow blooms)
4052-WC Flower Set 1 (window box flowers)
5008-WC Flower Set 3 (purple flowers)
4051-WC Foliage Set 1 (tiny grass)
4867-WC Foliage Set 3 (leaves in tree on left)

055-Process Yellow
177-Dark Jade
493-Reflex Blue
565-Deep Blue
665-Purple
879-Brown
925-Scarlet

Monday, March 30, 2020

Just Hopping By! | Art Impressions

Happy Monday my friends!  I am sure hoping you all are well and adjust to our current "normal".  I hope my card for today using the new Art Impressions Easter Bunnies set will bring you a smile and some cheer.  .  This is an adorable set that has several images so you can use it for many more occasions other than Easter!  Also, as I write this post, this is one of the new release sets that are on sale!  Be sure to check out the new release 20% off sale and the 60% off sale of so many other awesome sets!


Here are the steps for my card:
  1. Stamp, in Copic safe ink, the bunny that's laying down on an A2 piece of white card stock.
  2. Stamp the jumping bunny onto a separate piece of card stock.
  3. Color with the Copic markers listed below.
  4. I used a cloud stencil and some Tumbled Glass Distress ink to add clouds to the background.
  5. Die cut this panel with a Double Stitched Rectangle die and adhere to a black card stock layer.
  6. Fussy cut the jumping bunny.
  7. Adhere polka dot paper to a top-folding A2 card base and then the layered panel to that.
  8. Affix an action wobbler to the back of the jumping bunny and add it to the card front.
  9. Use a black pen to draw the dotted line.


I created a short little video clip to show the fun action of the bunny!


I stamped the sentiment in black ink and used a small Rectangle Double Stitched die to cut it out.  I layered it onto some black card stock and popped it up with foam tape.


I really had a lot of fun making this sweet interactive card!  Thanks so much for stopping by!  Crafting is such a great stress reliever and I sure hope I've inspired you to make something!


Copic markers:
C3, C1, C00, Y08, Y04, Y00,
YG67, YG17, YG25, YG03, YG01,
V05, RV55, RV63, RV02, RV10

Supplies:
Honey Bee Stamps Balckground Blender Brushes
Honey Bee Stamps Back To Basics 6x6 paper pad

Wednesday, March 25, 2020

Keeping Christmas Blog Hop - March 2020

Hello friends!  I hope today finds you safe and healthy!  It's time for the monthly Keeping Christmas blog hop and I have a card with a beautiful dimensional wreath for you.  The blog hop list is below and you don't want to miss the awesome inspiration by the so very talented designers!


Today I've used Concord & 9th's Magnolia Wreath stamps and die to create this card.  I have always loved creating dimensional projects and shaping the flowers and greenery!


Create the card base:
  1. Cut a piece of patterned paper to 4" x 5-¼".  Adhere it to a top-folding A2 card base.
  2. Stamp the sentiment near the bottom with Versafine Onyx Black ink.
  3. Die cut the ledge from white card stock.
  4. Score a line on the ledge for some dimension.  Add thin foam tape to the back and adhere it above the sentiment.


Create the wreath:
  1. Stamp the first layer of the wreath with Mist (the lightest green ink).  I used the wonderful new Rubbernecker Stamps Color Fuse inks.  Each set has four ink cubes that are shaded from light to dark.  Links to the specific sets I used are in the product list below.
  2. Stamp the second layer of the wreath with Basil (the darkest green ink).
  3. Stamp and die cut the leafy branch several times in various shades of green and die cut.
  4. Die cut the berry branches and twigs from white card stock.  Ink them with Moss green ink and Caramel brown ink.
  5. Add Red Berry Nuvo Crystal Drops to the berries and set aside to dry.
  6. Die cut the flowers and stamp the center with Mocha (the lightest brown ink).
  7. Adhere a small flower to the center of the larger flower.
  8. Add a small puddle of glue to the layered flower and two small flowers and drop in some Gilt Trip Mini Prills.


Shaping the greenery and flowers/assembling the wreath:
  1. To help shape the flowers and leaf branches, working with a few pieces at a time, very lightly (just one spritz!) mist the back of each piece.
  2. Use the stylus and pull it across the back of each leaf and the flower petals.  Flip them over and lightly press the stem of the branch to shape.
  3. Press the stylus in the center of the flowers in a circular motion.  Let the pieces dry for a few minutes.
  4. Add thin foam tape to the back of the wreath base.
  5. I arranged and adhered five full pieces of the the leafy branches in a circular shape.
  6. Cut the remaining leafy branches in half and adhere around the wreath.
  7. Adhere the flowers, twigs, and berry branches as shown.
  8. I used some brown ink to "color" some twine, tied a bow, and adhered it to the wreath.
  9. To finish, I added thin lines of liquid glue here and there on the leaves and sprinkled on some Hero Arts Icicle Glitter.  I just love the subtle sparkle this glitter gives!


I sure hope I've inspired you to get going on the Christmas cards.  I know that I will be very happy to have these come December!  Thank you for stopping by; and now be sure to check out these fabulous and talented designers to see their Christmas creations:
Carol Hintermeier << that's me!


Supplies: