Pages

Wednesday, March 31, 2021

Wishing You A Hoppy Easter | Honey Bee Stamps

 Hello crafty friends!  It's almost Easter and I just had to use Honey Bee Stamps' adorable Easter Buddies set for one last Easter card!  I had lots of stencil fun creating my background!  Keep reading for the details!


First I created my background.  I have a few photos below showing my steps.  All of my inks are Distress Oxide inks and I used Honey Bee's Blender Brushes for my stenciling, which makes it really easy!  First I laid out the Oak Tree and Grassy Hill Borders stencil sets and placed them on my A2 80# Neenah card stock to kind of make a plan for my stenciling.  I used Gathered Twigs and Ground Espresso for the tree trunk.  Next I stenciled the tree and leaves with Mowed Lawn, Twisted Citron, and Rustic Wilderness.  The grass and hills are Mowed Lawn with a touch of Twisted Citron.

When I was finished, I realized I had a white sky!  So I used my Blender Brush for blue Oxides (without adding more ink) and lightly stenciled in some clouds with the cloud stencil that's in the Outdoor Scene Builder stencil set.  (TIP:  I keep one Blender Brush for each Oxide color family.  I just wipe it off on a clean, dry paper towel between each shade of that color and it works great!)


I decided to add a few water splatters to the grassy area and covered up the other parts before sprinkling on the water drops.  I took a clean paper towel and blotted it dry.  I wanted to add water drops to the tree, but I was too afraid of messing it up!  LOL!  I die cut the panel with the largest Deckle Edge A2 Honey Cuts.

Next I stamped all of the adorable little images from the Easter Buddies set in Copic safe ink and colored them with my Copic markers.  Then I cut them out with the coordinating Honey Cuts.  As I was planning on where to put everything on the card, I thought that the tree looked like it needed something more.  I remembered the cute little birdhouse and bird in the Birds and The Bees set and stamped, colored and die cut them with their coordinating Honey Cuts.


I decided to fussy cut the little grass pieces so they wouldn't cover up the eggs as much.  I added foam tape to the back of the birdhouse, bunny, chick and flower group and adhered them to the card front.  I adhered the other images with Bee Creative Glue.


I had a hard time choosing from all of the fabulous sentiments in the Hoppy Easter stamps, but finally decided on two.  I stamped them in Onyx Black ink and die cut them with the coordinating Honey Cuts.  I LOVE having dies for sentiments and Honey Bee does them so well!


I had so much fun creating this card!  The stencils sure do make creating backgrounds so easy!  I hope you have a wonderful weekend and a very blessed "Hoppy" Easter!  Thank you so much for stopping by!

Supplies:
Distress Oxides:  Mowed Lawn, Twisted Citron, Rustic Wilderness, Ground Espresso, Gathered Twigs


Tuesday, March 30, 2021

Happy Easter, Happy Spring! | Rubbernecker Stamps

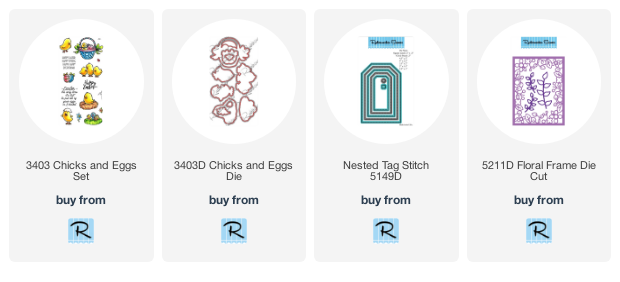
 Hello my friends!  I can't believe that March is almost over and that Easter is almost here!  Today I'm sharing a card I made using Rubbernecker Stamps' adorable new Chicks and Eggs Set.  I hope you will check this set out so you will see the oh so cute chick stamps and other images that are included!


For the card base, I die cut two Floral Frames from 80# white card stock and adhere together with liquid glue.  Then I adhered the Floral Frame to colored card stock and glued this to a top-folding A2 card base.


Then I used the largest Nested Tag Stitch die to cut 80# white card stock.  I used my MISTI and stamped the images from the Chicks and Eggs set in Copic safe ink.  I stamped the basket first, then the grass, flowers and ladybug.  I colored them all with my Copic markers.

Next I created a pink layer for the tag.  I traced around the largest tag die with a pencil and used my paper trimmer to cut it out.  I adhered the pink tag to the back of the tag with the images.  I added foam tape to the back of the tag and adhered it to the card front.

I used some of my ribbon hoard stash (LOL!) and added a pink bow to the tag.  Then I added some pink gem stickers and some sparkle to the eggs and flowers with a clear glitter pen.


Thank you so much for stopping by!  I hope you have had a wonderful beginning to spring with lots of crafty time!

Thursday, March 25, 2021

Altenew Celebrating Parents Card Drive Blog Hop + Giveaway

Hello friends!  I am so excited to be joining in a very special blog hop today!  Altenew is hosting a Celebrating Parents Card Drive to send cards to the elderly that live in nursing homes or shelters to let them know they're not forgotten.  Please check out Altenew's Celebrating Parents Card Drive blog post for the details on how you can join in this wonderful card drive!

You should have arrived here from the blog of Arjita Sepaha Singh.  If you need to start at the beginning, please head over to the Altenew Card Blog.  I have the entire hop list at the end along with all of the Giveaway information.

Altenew has chosen a few of their beautiful products that are great for your Mother's Day and Father's Day cards (and other year-round projects)!  From 3/6/2021 to 5/31/2021, Altenew is so very generously donating $1 for every order of the following stamp sets  to the Food Bank of Central New York to support seniors in need.  This is a wonderful time to pick up one (or more) of these awesome sets.  


Now for my card details!


First I created my background for my card.  I used some texture paste and added a tiny drop of  Wilted Violet Distress Ink, mixed it up and spread it through the Sketched Lines Stencil, but just in the two corners.  Love this stencil!  I set it aside to dry.  After it was dry, I stamped the sentiment from the Extra Special stamp set in black ink.

I had so much fun ink smooshing onto watercolor paper to use for my die cutting with the beautiful Craft-A-Flower: Antique Rose Layering Die set!  I used Altenew's watercolor paper to smoosh my inks and love how it turned out!  I used all Distress Inks in these colors:  Rustic Wilderness, Mowed Lawn, Twisted Citron, and Wilted Violet.  I die cut the Antique Rose flower and leaves and added them to my background panel.

I added some clear sparkle pen to the next-to-the-top layer, but it sure doesn't show up very well in my photos!  I really did try, so I'm sorry it looks less than sparkly, but it is in real life!!

Thank you for stopping by and I hope you've been inspired to join in this wonderfully kind Card Drive!

Your next stop on the hop is the awesome Cheryl Espie!

Giveaway Prizes

$200 in total prizes!  To celebrate this Card Drive blog hop, Altenew is giving away a $50 gift certificate to 2 lucky winners and a $20 gift certificate to 5 winners!  Please leave a comment on the Altenew Card Blog and/or each designer's blog post on the blog hop list below by March 31, 2021 for a chance to win!

Altenew will draw 7 random winners from the comments left on each stop of the blog hop and announce the winners on the Altenew Winners Page on April 2, 2021.

Blog Hop Order

Altenew Card Blog

Nathalie DeSousa

Tenia Nelson

Virginia Lu

Alex Syberia

Arjita Sepaha Singh 

Carol Hintermeier--that's me!

Cheryl Espie

Dana Joy

Eva Bussom

Helen Kalb

Hussena Calcuttawala 

Jenny Colacicco

Joylita Dsouza

Kelly Griglione

Linda Westfall

Nandini Karmarkar

Natasha Davies

Preeti Chandran

Sandhya Iyer

Sandra Woodson

Seeka

TaeEun Yoo

Terri Koszler

Bridget Casey

LauraJane

Wednesday, March 24, 2021

Old Rugged Cross Easter Card | Honey Bee Stamps

 Happy Wednesday friends!  My card today features the beautiful Honey Bee Stamps Old Rugged Cross stamp set and coordinating Honey Cuts   As you probably know, this next Sunday is Palm Sunday and I thought the Palm Frond Cover Plate die was the perfect background!  This stamp set is so very special to me as it reminds me of being a small child, being at church with our Mamaw (grandmother), and looking up at her while she sang this song with such joy in her eyes!  She loved this song (and so do I)!

I created my card base by die cutting the Palm Frond Cover Plate die three times from Neenah 80# card stock.  I adhered the layers together with Bee Creative glue and then adhered these to a top folding A2 card base.  I put a large stamp block on top to press it all down while it dried.  Next I die cut an oval from the Double Stitched Ovals Honey Cuts.  I adhered this to the center of the card base and put the stamp block back on it all to dry.


While the card base dried, I stamped the floral cross from the Old Rugged Cross stamp set in Copic safe black ink.  I also stamped the small flowers and palm fronds.  I colored them all with my markers and cut them out with the coordinating Honey Cuts.  (All my my marker colors are listed at the end.)

I stamped the sentiment from the Old Rugged Cross set in black ink and die cut it with the coordinating die.  I love how there are dies for the sentiments!  I added foam tape to the back of the sentiment and the cross.  Then I adhered them to the card front.  I used Bee Creative glue to adhere the extra flowers and palm fronds.

I love how this card turned out!  Be sure to check out this Old Rugged Cross set to see the other sentiments that make this a go to set for several occasions!  Thank you so much for stopping by today!

Copic markers:

pink flowers: RV09, RV17, RV06, RV02
greenery: G29, G07, YG09, and YG17, YG25, YG01
cross: E25, E34, E53

Monday, March 22, 2021

Altenew Paint-A-Flower: Coral Sunset Outline Stamp Set Release Blog Hop + Giveaway

Hello crafty friends!  I'm totally thrilled to be joining in the fun to celebrate the new release of Altenew's gorgeous Paint-A-Flower: Coral Sunset Outline Stamp set!


 You should have arrived here from the awesome Terri Koszler!  If you need to begin at the start, head over to the Altenew Card Blog.  The Paint-A-Flower: Coral Sunset Outline Stamp set is a beautifully drawn image that you can color any way you want!  This is also part of their monthly subscription plan so you won't need to worry about missing out on any of the Pain-A-Flower releases.  Click each image to go to Altenew's shop for more information.


I had such an enjoyable time watercoloring this beautiful image!  I used Altenew's Watercolor 36 Pan Set to do all of my coloring.

I stamped the image onto Bristol Smooth card stock with Versamark ink.  Then I sprinkled on Rose Gold Crisp Embossing Powder and heat set it.  I painted the flowers with multiple layers of Coral Berry.  The leaves are painted with Forest Glades and some Bamboo.  I painted a diluted wash of Coral Berry around the flower on the background.  Then I added some gold metallic spatters after I covered the flowers with scraps of paper.


I heat embossed the sentiment onto vellum with Rose Gold Crisp Embossing Powder.  Then I wrapped the strip of vellum around the painted panel and popped it up with foam tape.  I love the shine of the gold embossing and metallic spatters!


Thank you so much for stopping by!  I think this stamp set is so beautiful and can't wait to try coloring it with my markers!

Up next on the hop is the so talented Nathalie DeSousa!

The giveaway details:

$200 in total prizes!  To celebrate this release, Altenew is giving away a $50 gift certificate to 2 luck winners and a $20 gift certificate to 5 winners!  Please leave a comment on the Altenew Card Blog and/or each designer's blog post on the hop list below by March 27, 2021 for a chance to win.  Altenew will draw 7 random winners from the comments left on each stop of this blog hop and announce the winners on the Altenew Winners Page on March 30, 2021.

Blog Hop List:

Altenew Card Blog

Emily Midgett

Jenny Colacicco

Norine Borys

Keren Baker

Therese Calvird

LauraJane

Jaycee Gaspar

SathyaKala Sankaran

Verity Biddlecombe

Rachael Shedeed

Yoonsun Hur

Virginia Lu

Dana Joy

Terri Koszler

Carol Hintermeier << that's me!

Nathalie DeSousa

Seeka

Amanda Baldwin

Katrina Howe

Sunday, March 21, 2021

Flying By to Say Happy Birthday | Papertrey Ink/Ink To Paper New Release

 Happy new week my friends!  I was thrilled to be invited to create with some of the new products from Papertrey Ink/Ink To Paper's March 2021 release!  Thank you Papertrey!

Today I'm sharing a card I made with the gorgeous Flying By set!  I had lots of fun choosing various inks from my stash to create this beautiful and colorful butterfly!

I first stamped the butterfly in some black ink and then used the layering stamps to add the various colors to the butterfly's wings and body.  I used the coordinating die to cut it out and added foam tape to the back.

Next I stamped the Flying By sentiment from the set in black ink and used the coordinating die to cut it out.  I love how there are several other sentiments for different occasions in this set!  I used the happy birthday sentiment and trimmed it into a rectangle shape.


Next I used the oh so beautiful Dainty Deliveries Frame die and die cut a white frame with it.  Note: I added a sheet of Stick-It to the back of my card stock before I die cut it.  This makes it so much easier to adhere the detailed piece!  I adhered it to a top-folding A2 card base.  Next I adhered the sentiments and the butterfly.


This was such a fun and easy card to make!  This release has lots of beautiful new sets in it and you can check it out in the Ink To Paper shop.  Thank you so much for stopping by!  I hope you have a wonderful and crafty week!

Friday, March 19, 2021

March 19 - Rubbernecker Coffee Loving Card Makers BH

Hello friends!  Today is the first day of the 2021 Spring/Summer Coffee Loving Card Makers blog hop!  Rubbernecker Stamps is one of their "super sponsors" and I've created two coffee cards for the occasion!  When you are finished here, be sure to head over to Rubbernecker's blog to get started on the hop and get the details for how to win a $50 gift certificate from Rubbernecker!   Also, be sure to check out the Coffee Loving Cardmaker's blog for how to win one of many prizes!!!!

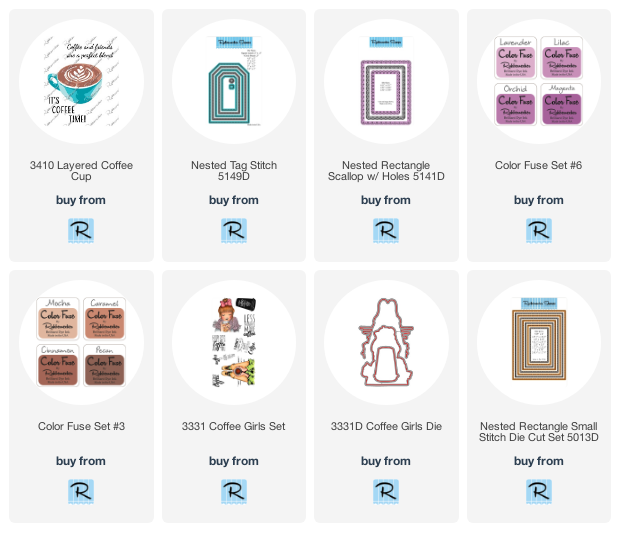
For my first card, I've used Rubbernecker's new Layered Coffee Cup stamp set!  This is a cool layered stamp and it's very easy to line up each layer following the included guide! 

To start, I created the background by inking up the edges of a 4-¼" x 5-½" white card stock panel with Lavender ink (from Color Fuse Set #6).  I just swiped the ink pad along the edges.  I cut a 2-¼" strip of patterned paper from my stash and adhered it to another A2 sized white card stock.  I cut a thin strip of card stock and it with Lavender ink.  I adhered it above the patterned paper.  Then I die cut the piece out with the largest Nested Rectangle Scallops w/Holes die.  I adhered this to the inked panel and attached it to a top-folding A2 card base.

Next I stamped the beautiful Layered Coffee Cup with Lilac, Orchid, and Magenta inks.  I stamped the coffee layers with Cinnamon and Pecan inks (Color Fuse Set #3).  To add shine to the coffee, I used the base layer to stamp on some Versamark ink.  I sprinkled on clear embossing powder and heat set it.  I fussy cut the cup out, added foam tape to the back, and then adhered it to the card front.  I love how the embossing shines on the coffee!

I stamped the sentiment from the set in black ink and die cut it with the smallest Nested Tag Stitch Die.  I used a pencil to trace around the outside of the tag die, trimmed it along the pencil lines and then inked the edges with Lavender ink.  I adhered it to the sentiment and popped it up with foam tape.


*****************************************************

My next card features the beautiful gal from the Coffee Girls Set.

This is a very easy and quick card!  I stamped her in Copic safe black ink and colored her with my Copic markers.  Then I used the coordinating die to cut her out and added foam tape to the back.  I stamped the sentiment in Versamark black ink and trimmed it into a rectangle shape and added foam tape to this too.

For my card base, I chose two pretty patterned papers from the Carta Bella Flora #3 6x6 paper pad.  I die cut  both papers with the largest Nested Rectangle Stitch die.  Then I trimmed the floral paper into a triangle and adhered it to the bottom of the rose colored paper.  I added a thin strip of black card stock to the cut edge.  Next I adhered the paper to a top-folding A2 card base.  I added a few gems here and there for some sparkle!

Thank you so much for stopping by!  Be sure to go to Rubbernecker's blog to see more beautiful inspiration from the team!


Here are links to the Rubbernecker products I've used:

Wednesday, March 17, 2021

Springtime Floral Birthday Card | Honey Bee Stamps

Happy Wednesday crafty friends!  I am SO ready for spring time and to plant all of the flowers!!  This beautiful Farm Fresh Flowers stamp set suits my mood perfectly!


I began by stamping the flowers and vase from the Farm Fresh Flowers stamp set in Copic safe ink and coloring them with my Copic markers.  I have all the colors I used listed at the end.  I used the coordinating Honey Cuts to cut them out.  I added thin foam squares to the back of the vase and regular foam squares to the flowers and set them aside.

I stamped the sentiment, from the Buzz stamp set, in Versamark ink onto black card stock.  I sprinkled on some white embossing powder and heat set it.  Then I trimmed it down and added foam tape to the back.

Next I die cut the Quilted A2 Cover Plate from white card stock.  I adhered it to a top-folding A2 pink card base.  I adhered the vase, flowers, and sentiment to the card front.

Next I placed these sparkly, shiny pearl colored gem stickers at the intersecting points of the stitched lines.  I found these in the Sweet On You gem stickers.  I love all of the subtle sparkly fun!

I hope you've enjoyed my dose of springtime flowers today!  Thank you so much for stopping by!

Copic markers:

tulips: RV13, RV02, RV10
purple flower:     RV66, V06, V05, RV63, RV52
yellow flower:  Y19, Y18, Y13, Y00
hyacinth: RV66, RV17, RV04
greenery:  YG67, YG25, YG03, and G28, G07, YG09, YG07
vase:  B0000, B000, B00, C3, C1, C00

Tuesday, March 16, 2021

Slimline Happy Easter Card | Rubbernecker Stamps

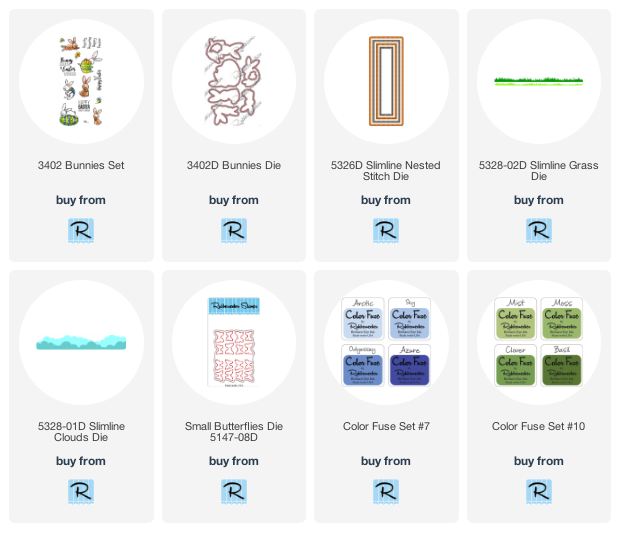
Hello crafty friends!  Today I'm sharing a cute slimline card with Rubbernecker Stamps' new Bunnies Set.  This is such an adorable set that has three more sentiments plus three more bunnies in it!  So much fun!  I used their Color Fuse inks to add color to the grass and cloud layers too!  Keep reading for the details!

Card base:

  • Create a slimline card base by scoring a 7" x 8-½" white card stock at 3-½".  Fold at score line.
  • Die cut two pieces of white card stock with the largest Slimline Nested Stitch die.  On one blend Arctic Color Fuse ink along the top with a foam ink blending tool.  (I began with an ink blending brush, but with light colors, I find that a foam tool lays down the ink faster and more even.)
  • Use one of the Slimline Clouds dies and die cut the clouds across the top of the second Slimline Nested Stitch piece.
  • Blend Arctic ink along the bottom of the second piece leaving the area just below the cloud line white.  
  • Stamp the sentiment, as shown on the finished card, in black ink.  Add foam tape to the back of the cloud piece and adhere to the other Slimline Nested piece.  Adhere these to the card base.
  • Next, cut some white card stock into two 1-¼" x 8-½" strips.  Use the Slimline Grass dies to die cut the strips near the top edge.  Blend Mist and Basil Color Fuse inks on the grass strips.  
  • Next, die cut each grassy strip with the largest Slimline Nested die to add stitching along the bottom.  See the photo for further explanation.
  • Add liquid glue just along the bottom edge of the light green grass and adhere to the dark green grass.  Then add liquid glue to the back side just along the bottom and adhere to the card.  The reason for adding the glue just along the bottom edges is so I can easily tuck the images into the grass.

Card elements:

  • Stamp the images from the Bunnies Set with Copic safe ink.  Color them with Copic markers and fussy cut them out.  (There are coordinating dies that I ordered but had not received at the time I was making my card.)
  • Arrange the images and adhere with liquid glue.  Note:  I did not add glue to the bunnies' ears so I could slightly bend them up for dimension and to add even more cuteness to them!
  • Die cut white card stock with the Small Butterflies die.  Use a black Micron .05 pen to draw the butterflies bodies, then color with Copic markers.
  • Add a dot of glue to the center of the butterflies and adhere to the card.  When dry, bend the wings up for some dimension.


To finish, I added some sparkle with a clear glitter pen and Glossy Accents to the egg details.  I know it doesn't show in the photos (I tried!!) but it does add a fun bit of bling!


I hope my card today has inspired you to get hopping on those Easter cards!  Thank you so much for stopping by!!!


Click the images to check them out:

Monday, March 15, 2021

Altenew Mini Delight: Smile Blooms

 Hello friends!  Today I'm sharing this card featuring Altenew's new release of the Mini Delight: Smile Blooms Stamp and Die set.  This is part of an Instagram hop, and if you'd like a chance at an awesome prize, head on over to my my Instagram and leave a comment.  I have all of the hop details there too!  Now, onto my card!


I'll be honest here and say that at first, I was quite intimidated by such a small little stamp set (it's 2" x 3")!  I was wondering how in the world was I to make a full A2 sized card with it?!  Remember, I'm not known for CAS cards!  LOL!  So I thought I'd get started by just stamping the two-layer stamp in various shades of pink.

I put the bottom flower layer in my MISTI and stamped it with either Baby Pink or Puffy Heart ink.  I varied the intensity of the layer by double- or triple-stamping the layer.  I lined up the second flower layer and stamped that in one of the same ink colors, but just stamping it at least three times.  I stamped the center with Sunray ink.  Next I stamped several of the leaves using Forest Glades and Evergreen ink.  I used the coordinating dies to cut them all out.

I stamped the Apothecary Label in Jet Black ink and used the coordinating die to cut it out.  I stamped the sentiment, from the Smile Blooms stamp set, onto the label with Versamark.  I added white embossing powder and heat set it.

Next I created the card base by adding a few pink and black spatters to a 4-¼" x 5-½" card base.  Next I created the frame by die cutting some 80# Neenah with the Fine Frames Rectangles die.  Now, I was planning just using one of the frames.  However, when I removed the paper from the die, all five of these pieces stayed together.  (The pieces were totally cut through, but probably because of my well-used cutting plate, they were still somewhat attached!)  I liked the thought of using them together, and carefully turned the frame over and added foam tape to the back to keep the pieces together, and to pop it up on the card.

After I added the frame, I added the flowers using glue or foam squares.  Next I tucked in the leaves and popped up the sentiment in the center.  I love the dimension of this!


Thank you so much for stopping by and I hope to see you over on Instagram for the hop!

Wednesday, March 10, 2021

Spring Joy Bouquet Slimline Birthday Card with Inky Background | Honey Bee Stamps

 Happy Wednesday friends!  Today I'm sharing a card I made with Honey Bee Stamps gorgeous Spring Joy Bouquet stamp set and coordinating Honey Cuts.  I had so much fun creating my inky, splattered background!  Keep reading for the details!

I started by creating my inked background.  I used a piece of Strathmore Bristol Smooth card stock that I trimmed to 9" x 4-½".  Using my Background Blender brushes I blended on Picked Raspberry Distress Oxide onto each end at a diagonal.  My next color is Kitsch Flamingo Distress Oxide and I blended it over the edge of the Picked Raspberry up towards the center.  I first used Squeezed Lemonade in the center, but thought it was a tad too bright.  So I lightly went over it with some Wild Honey Distress Oxide.  All good!

Next I added spatters of the same colors of Distress Oxide inks.  I also added white Perfect Pearls and some metallic gold spatters.  When it was dry I die cut it with the Slimline Sentiments Eyelet die.  This die cuts two pieces, the center and then a scalloped frame.  I cut three more from white card stock and adhered the three frame pieces together with Bee Creative glue.  I adhered the pieces to a 3-¾" x 8-¾" card base.

Now it's time to stamp the Spring Joy Bouquet with Versamark ink onto more Bristol Smooth card stock.  I sprinkled on some Ranger Princess Gold embossing powder and heat set it.  I used the same colors of Distress Oxides, along with Wilted Violet, Mowed Lawn and Rustic Wilderness, to watercolor the image.  When it was dry,I used the coordinating die to cut it out.  Next I die cut four of the sentiment "happy" that's included with the Slimline Sentiments Eyelet die set.  I adhered each layer with glue and set a heavy stamp block on them to dry.  I die cut one more "happy" and pressed my Versamark pad onto it, sprinkled on Princes Gold embossing powder, and heat set it.  I adhered it on top of the layered sentiment, slightly offset.

I added foam tape to the back of the bouquet and adhered it to the card.  I used Distress Collage Medium Matte to adhere the sentiment.  I added a tag with a birthday sentiment that I embossed with the gold embossing powder.  The tag is in the Piece of Cake stamp set and coordinating Honey Cuts   I found the sentiment that fit in the Stellar Sentiments stamp set.  I adhered a tiny bow made from pink twine I have in my stash.

Thank you so much for stopping by!!  I always truly do appreciate you taking a bit of time to check out my cards!  Have a wonderful day!

Supplies:
Distress Oxides: Picked Raspberry, Kitsch Flamingo, Squeezed Lemonade,
Wild Honey, Wilted Violet, Mowed Lawn, Rustic Wilderness