Pages

Wednesday, December 29, 2021

Happy 2022 To You Shaker Card | Honey Bee Stamps

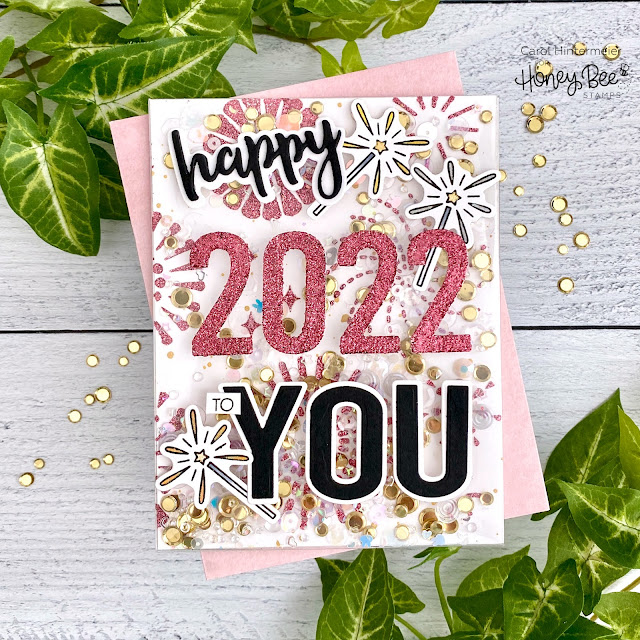
It's almost the new year, so I thought I'd make what is probably my last card for the year a fun and sparkly one!  I've created an edge-to-edge shaker card using several different Honey Bee Stamps products.  The background features the fun Layering Fireworks stencils with some Glitz Glitter gel!


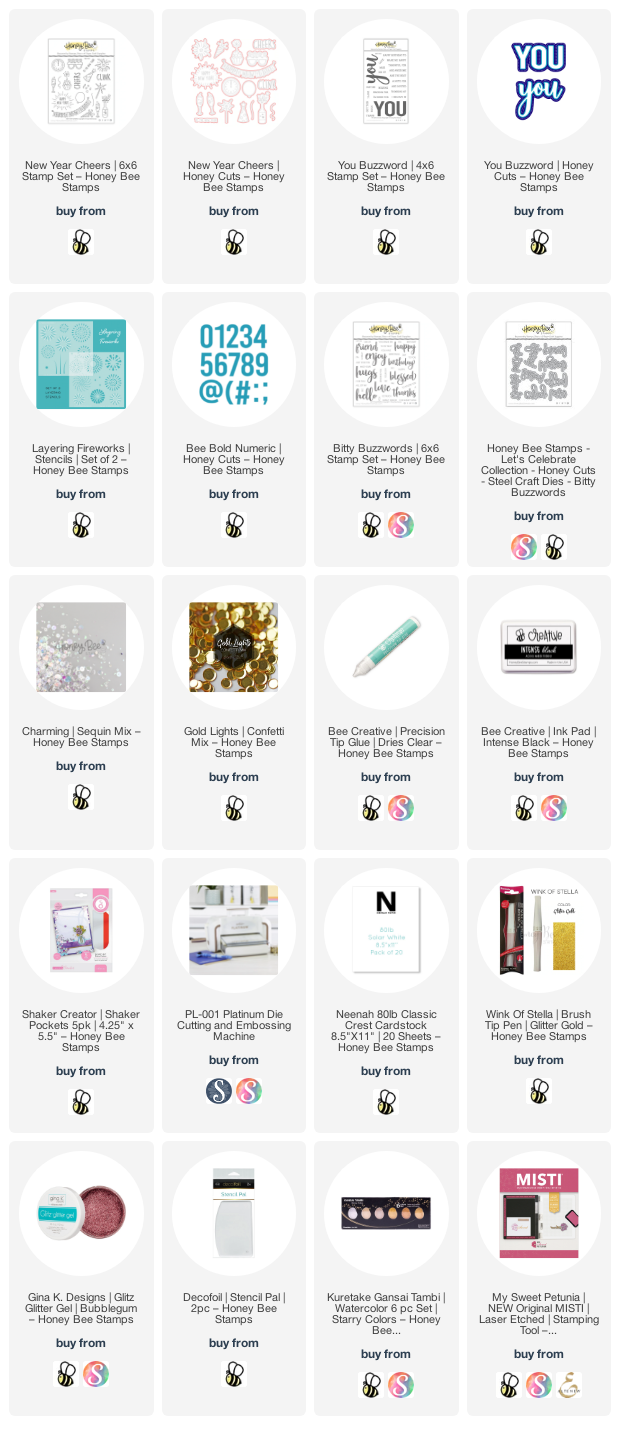
First I created the background layer that will be inside the shaker.  I spread some Bubblegum Glitz Glitter Gel through one of the Layering Fireworks stencils and set it aside to dry.  Be sure to wash up the stencil and your tools immediately!

I wanted the numbers to have the same pink glitter gel, but didn't want a huge mess.  First I die cut the Bee Bold Numeric dies from 80# Neenah--be sure to save the negative portion.  I added some temporary adhesive to the back of the numbers and stuck them back into the negative piece on an acetate package I retrieved from my trash.  Then I taped the piece to the acetate with some purple tape.  Next I spread the glitter gel over it all and removed the negative piece when I had the gel smoothed out.  TAH-DAH!  Nice, neat and clean numbers!!  I used my craft pick to pick them up and move them to my silicone mat for drying.  Check out these photos for a visual!  (You can click the photo to enlarge it.)

Next I die cut "happy" from the Bitty Buzzwords dies and "you" from the You Die set from white card stock for the shadows and black card stock for the top layers.  I adhered the layers together with Bee Creative glue.

I stamped the sparkler from the New Year Cheers set with Intense Black ink.  I colored the wand with a few gray Copics and the sparklers with silver and gold metallic pens.   I used the coordinating dies to cut them out. The tiny "to" sentiment is from the You Buzzword stamp set and I just taped off the "you" that's a part of the stamp, inked it up, removed the tape and stamped with Intense Black ink.

Now it's time to assemble the shaker!  It is so very easy with the Shaker Creator Shaker Pockets!  Before I added my stenciled panel to the shaker, I spattered on some gold metallic paint and dried it with my heat tool.  I did find that my background panel fit the shaker pocket better if I trimmed a sliver off of the top and one side.  I placed it face down in the pocket and removed all but the top adhesive liners and folded the tabs over to adhere.  Then I added some of Honey Bee's Charming Sequin Mix and Gold Lights Confetti Mix to the pocket and then adhered the top tab.  I added some very strong double-sided adhesive to the back of the shaker and added it to an A2 card base.

I used Bee Creative glue to adhere the sentiments and sparklers to the front of the pocket.  I used my t-ruler to get them all straight.  I love all of the sparkles!!!

I sure hope you've enjoyed my easy shaker card today!  I'm wishing you all the best with lots of crafty and happy times in 2022!  Thank you for stopping by!
Thank you so much, should you use my affiliate links!

Tuesday, December 28, 2021

Winter Card with Snowy Background Stenciling | Rubbernecker Stamps

 Hello my friends!  I hope that you have had a wonderful Christmas season so far!  Today I'm sharing a winter card featuring Rubbernecker Stamps Pine Tree Set and the Wavy Stencil.  I think this card could be used for several different occasions such as a thank you, thinking of you, get well--it all depends on what you put on the inside of the card!

First I cut a piece of light blue card stock to 4" x 5-¼".  Then I sprayed the back of the Wavy Stencil with Pixie Spray.  This spray makes using detailed stencils like this one so much easier!  I spread some white Glitz Glitter Gel through the stencil with a pallet knife.  I removed the stencil and immediately washed off the gel.  When the gel was dry, I added the panel to an A2 top-folding card base.  I love to find out-of-the-box ways to use supplies--in my mind these "waves" equaled a blustery, windy, winter day!

Next I stamped and embossed the Pine Trees with Versamark ink and some glitter embossing powder from my stash.  The green glitter embossing powder is from a company no longer in business.  For the white tree I used Shabby White Embossing Enamel by Stampendous.  Be sure to heat set this from behind so the heat tool won't blow it off of the card stock.  I fussy cut the trees out and added foam tape to the back of three trees.

Next I stamped the sentiment from the Pine Trees Set with Versafine Onyx Black ink and fussy cut it out.  I added foam squares to the back.

Then I hand cut two sets of hills from 4" wide card stock.  I adhered them together and added them to the card.  To finish up, I arranged and adhered the sentiment and trees on the card.

Thank you all so much for stopping by today!  I hope you enjoy the remainder of the holidays!  Stay crafty!

Wednesday, December 22, 2021

Can't Thank You Enough! | Honey Bee Stamps

Hello crafty friends! Today I'm sharing a thank you card I made using the beautiful new Hello Sweetheart stamps, coordinating Honey Cuts and layering stencils! These are all part of the awesome Sealed With Love release! I used the stencils to color the flowers and then stepped it up a bit by adding shading and depth with a few Copic markers. Keep reading for the details!

First I created my card base and layers. I used the Mod A2 Cover Plate die to dry emboss a piece of A2-sized purple card stock. Just use the die with your rubber embossing mat in the sandwich for your die cutting machine! (TIP: spritz a fine spray of water on your card stock before dry embossing to help eliminate cracks in the paper.) I inked Villainous Potion Distress Oxide around the edges and added spatters of diluted white gauche. I trimmed a bit around the edges and adhered it to a top-folding A2 card base.

Next I stamped the floral heart onto 80# Neenah with some Bee Creative No-line Coloring ink. The reason I used no-line ink is that I've found that when inking Distress Oxides over black ink, it really dulls the black stamped lines. So I left the stamp in my MISTI and re-stamped the image with Intense Black ink after I finished the stenciling.

The no-line ink shows just enough to easily line up the stencils!

I almost didn't re-stamp this in black--I think it's kind of pretty like this too!

I used these Distress Oxides through the layered stencils: Villainous Potion, Rustic Wilderness, Mowed Lawn, Squeezed Lemonade, and Mustard Seed. To be able to add shading with the inks, I used sponge daubers. Then I created more dimension to the flowers and leaves with some Copic markers. When you already have your flowers stenciled, this such a quick and easy way to add a bit of Copic coloring! I used these Copic markers: V17, V15, V09, V01, Y19, Y15, Y08, YG17, and YG25.

I stamped the sentiment from the Hello Sweetheart set in Intense Black ink. Next I die cut it with the coordinating Honey Cut. I added some foam tape to the back of the sentiment and heart to pop them up onto the card. For a touch of bling I added a few gems from the new Back To Basics Gem Stickers. I love how there are different sizes of gems in these new sets!!

I really love these coloring, layering stencils! They are really lots of fun to use! I hope you have the Merriest Christmas, if you celebrate; and if not, I'm wishing all the best for you during this season! Thank you so much for stopping by today!

Thank you so very much should you choose to shop with my links 💗

Friday, December 17, 2021

Sealed With Love Instagram Hop Card & NEW Wax Stampers!!

Hello crafty friends!  Today we have a fun Instagram hop to celebrate the Sealed With Love release by Honey Bee Stamps.  (There are prizes if you go over and comment!)  Today my card features the gorgeous new Lovely Layers: Roses die set by Honey Bee Stamps!  Also new are the Honeycomb Wax Melts and stampers.  I have a few tips for using this fun new product below!

First I die cut all of the Lovely Layers: Roses flower layers from 80# Neenah Solar White.  Then I used a few Copic markers (RV04, RV02, & RV00) to color and add shading to the layers.  I used Bee Creative glue to adhere the rose layers together.  I die cut the stem and leaf layers from green card stock and added shading with YG17, YG25, YG03, and YG01 Copic markers.

Next I used the new Geometric Background Stencil to create my background.  I first sprayed it with Pixie Spray to keep the fine lines of the stencil in place while I inked on Picked Raspberry and Kitsch Flamingo Distress Oxide inks with Detail Blender brushes.  I trimmed it to 4" x 5-¼" and adhered it to a top-folding A2 card base.

Now for the really fun part!  This was my very first time using wax melts and wax stampers.  I have to say it was really easy!  I poured my wax onto a silicone mat--this is a worry-free way in lieu of pouring the wax onto your card.  Once the wax is cooled, it easily comes off of the silicone!  I found that with Honey Bee's Honeycomb Wax Melts, three pieces in the Wax Melting Spoon was just the right amount.  I used the Pearl Wax Melts and you can check out the other wax melt colors in Honey Bee's shop.  I held the wax melting spoon over a small candle to melt the wax.  Be sure to watch it because you can burn the wax!  Yes, I did!  LOL!  I found that using my craft pick to stir it helped.

When you pour the melted wax onto your mat, immediately take your Wax Stamper (I used the Rose) and set it straight down into the wax.  DO NOT PRESS!  The wax stamper has just the perfect amount of weight to get a good impression.  It only takes a few minutes for it to cool and then just pick up the wax stamper.

I finished up by adhering the rose pieces to the card and using Bee Creative glue to adhere my wax seal.  Then I stamped a sentiment from the Inside: Kindness stamp set with Intense Black ink and cut it out with the coordinating die.  I added two pieces of thin foam tape to the back and adhered it to the card.

I created extra wax seals to add onto my envelopes from the Hugs & Kisses envelope pack!  

Have you used wax melts and wax stampers?  If not, I think you should because it's really fun and adds such a unique touch to your cards and envelopes!  I hope you've enjoyed my card making process today!  Thank you so much for stopping by!  Be sure to head over to my Instagram and leave a comment for your chance to win one of two Honey Bee gift cards!

Thank you so much if you use my affiliate links (NEVER any extra cost to you!)

Tuesday, December 14, 2021

Christmas Gnomes | Rubbernecker Stamps

 Hello crafty friends!  Today I'm sharing an adorable Christmas card featuring Rubbernecker Stamps Christmas Gnomes set.  I've also stenciled the plaid background panel with one of their new two-part stencil sets!  Read on for the details.

Here are the steps for my card base and panel:

  • First I die cut 80# Neenah card stock with the largest Nested Rectangle Small Stitch die.
  • Next I sprayed the back of the Plaid Texture Stencils with Pixie Spray.
  • Using an ink blender brush and the base layer Plaid stencil, add Crimson Color Fuse ink through the stencil.  Remove the stencil.
  • Position the second layer of the Plaid stencil over the card and add more Crimson ink through the stencil.
  • Next, die cut an oval in the plaid panel with the fourth largest Nested Oval Small Stitch die.
  • To create the frame for the oval, center the fifth largest Nested Oval Small Stitch die in the the nest largest size oval die and tape the two dies together with some temporary tape.  Die cut some white glitter card stock with the ovals.
  • Adhere the plaid panel onto a top-folding A2 card base with liquid glue.
  • Adhere the frame around the opening with glue.

Creating the image and scene:

  • Stamp the gnome from the Christmas Gnomes set onto 80# Neenah card stock.  Die cut the Neenah card stock with the fourth largest Nested Oval Small Stitch die.
  • Also, stamp the image onto some masking paper and then fussy cut it out.
  • Stamp the sign for the gnome onto 80# Neenah and fussy cut it out.
  • Next color the images with Copic markers.  (My marker colors are listed below.)
  • Stamp "Merry Christmas" from the Christmas Gnomes set onto the sign with Versafine Onyx black ink.  Add clear embossing powder and heat set it.
  • Now apply the mask to the gnome and and use an ink blending brush to lightly add some Arctic Color Fuse ink to the top 2/3rds of the image for the sky.
  • Place the stamped oval in your MISTI (or other stamp positioning tool).
  • Stamp a few trees from the Pine Tree Set with Shadow Creek and Mountain Pine Color Fuse inks.
  • Use Copic markers to draw in a few shadow and hills for the snow.  (I used BV0000, BV000, C2, C0, and C00.)
  • Remove the mask for the fun reveal!

Finish the card by adhering the gnome image into the die cut opening on the card front with glue.  Then add a few small foam squares to the back of the sign to pop it up on the gnome.

It was really fun using the stencils and creating my little scene for the adorable gnome!  Thank you so much for stopping by!

Copic colors:

R89, R39, R37, R35; E59, E57, E23, E34; G28, YG17, YG25; E11, E21, E51, E50; BV0000, BV000, C2, C0, C00; W5, W3, W1

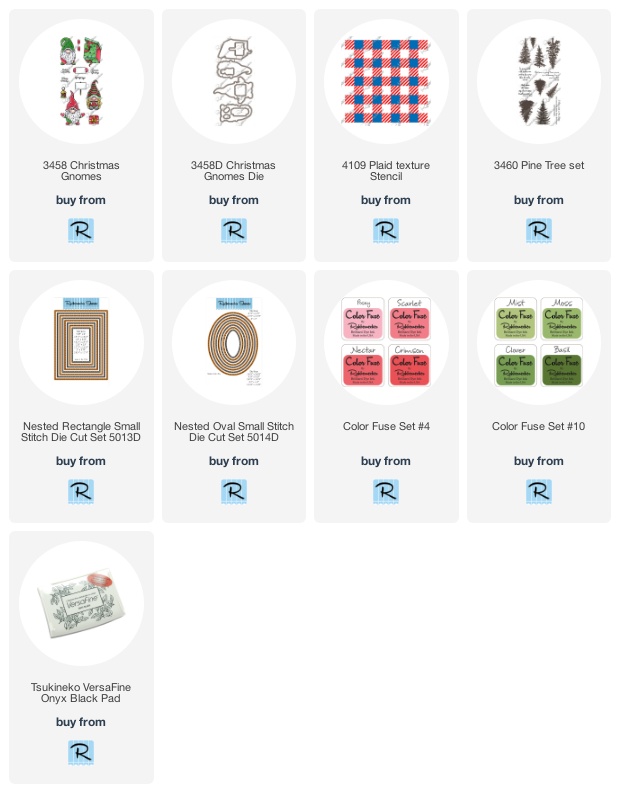
Products I've used to create my card:

Wednesday, December 8, 2021

Baked With Love Apron Shaped Card | Honey Bee Stamps

 We are well into December now, and I'm still making Christmas Cards!  Today I'm sharing my card using Honey Bee Stamps Apron A2 Card die set.  I've made a sweet Christmas apron shaped card to go with some sweet treats that I baked.  This set is a previously released set that works beautifully with some new patterned paper and the sentiment I used on the inside of the card!

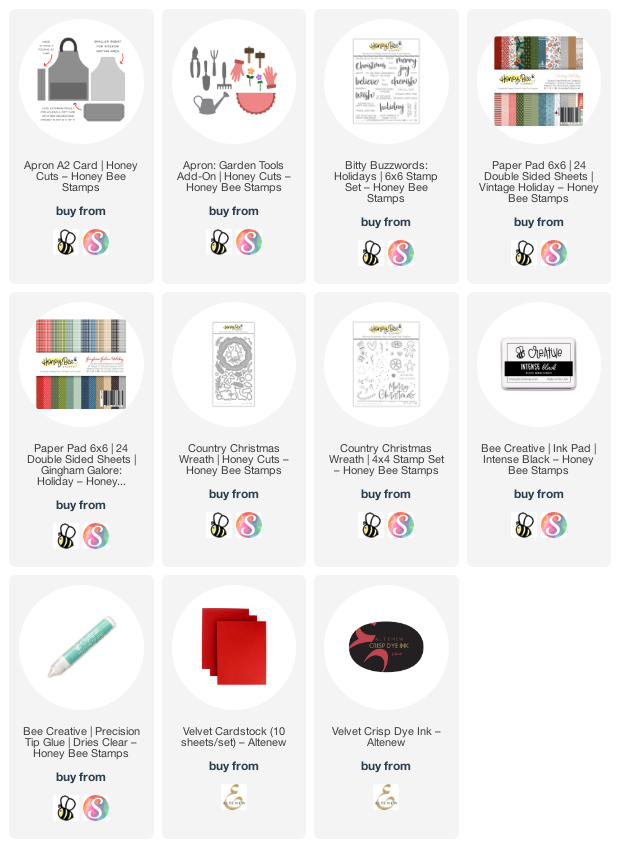
I began by die cutting the bigger A2 Apron Card die from some red card stock and from 80# Neenah.  I used the smaller apron die to cut red gingham paper from the Gingham Galore: Holiday paper pad and adhered it to the red die cut apron. I didn't use the apron pocket in the set, but chose the apron pocket from the Apron Garden Tools Add-on set.  I thought the shape and the scalloped edge were perfect for my Christmas apron!  The patterned paper for the top layer of the pocket is from the Specialty Holiday Card Pack that's free with a qualifying purchase, while supplies last.

Next I used a couple of the sentiments from the Bitty Buzzwords: Holidays and stamped them on the other white die cut apron with Intense Black ink and red ink from my stash.  Then I added strips of leftover gingham and red card stock near the bottom with Bee Creative glue.

So....you did you notice that the hinge I die cut (it's a die in the Apron: A2 die set) and adhered covered up part of my strips near the bottom.  Yep, I didn't notice that "oops" until I photographed the card!  Well, it is handmade, not Hallmark, right?  Haha!

Moving on, I then stamped the elements for the card front.  The sentiment and the baking tools are from the Baked With Love stamp set.  After stamping with Intense Black ink, I colored them with my Copic markers and used the coordinating dies to cut them out.

I wanted some greenery to tuck in the apron pocket and found these pieces that were leftover from a previous project using the Country Christmas Wreath.  Do you save the extra bits in the hope to use it another time?  I always do!!  The little gingerbread cookie is also from this set and another leftover.

I arranged the elements in the apron pocket and adhered them with Bee Creative glue.  I popped the sentiment up with foam squares.  I used a #10 white gel pen to add the stitches on the apron and dots on the scalloped edge of the pocket.

There are so many of Honey Bee's sets that were previously released and are my favorites!  I love being able to pull some out to use with the new products!  Thank you for stopping by today!  I hope the rest of your week is fabulous, and crafty!!

Sunday, December 5, 2021

Making a Glittery Background with a Snowflake Stencil | Rubbernecker Stamps

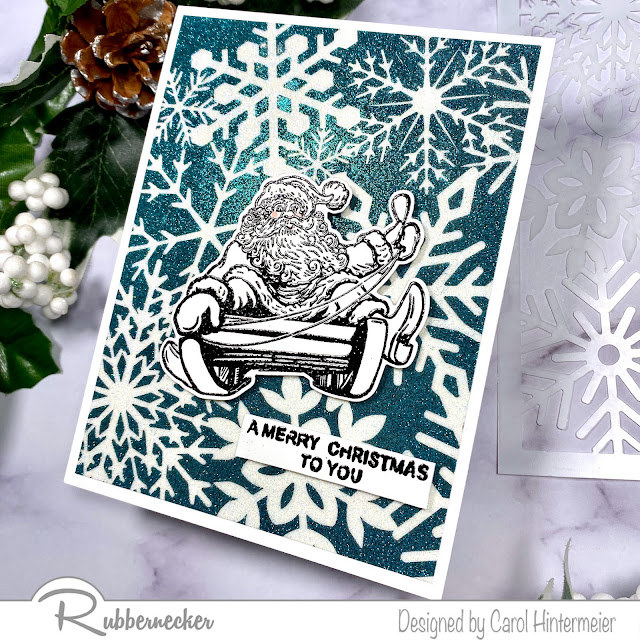
 Today I'm sharing a Christmas card I made using Rubbernecker Stamps new Snowflake Stencil and the Santa Post Card set.  Want to know how I used the stencil to get an "all over" glittery background?  Read on for the details!

Let's create the glitter background:

  • Add an A2 sized piece of double-sided adhesive to an A2 sized piece of white card stock.
  • To keep the Snowflake stencil from sticking way too much, and possibly being ruined, I pounced my anti-static powder pouch heavily on the back of the stencil.  (see photo of steps below)
  • Remove the adhesive backing and lay the stencil on the card.  Press it down, especially the fine detailed pieces of the snowflakes.

  • Add the turquoise microfine glitter to the card.  Microfine glitter works best with this technique.  I used my finger to burnish the glitter to the adhesive.
  • Next, brush off all of the excess glitter.  I used a thick soft brush to sweep a lot of it away.  Also, I keep cut up pieces of Swiffer Dusting cloths handy.  These cloths grab all the stray glitter and helps with the clean up a lot!
  • Now it’s time to remove the stencil.  I used my craft pick tool to hold the card down while I carefully removed the stencil.
  • Sprinkle the Cool Diamond microfine glitter over the card.  Burnish and then sweep away the excess.  Now you have a beautiful, sparkly snowflake background!
  • Trim the panel to 4″ x 5-¼” and adhere to an A2 top-folding card base.

Steps for the image and sentiment:

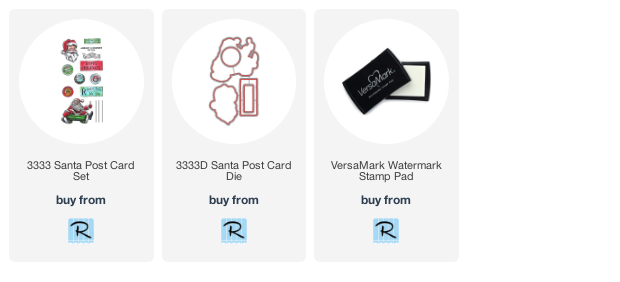
  • Stamp the Santa on the sled from the Santa Post Card set with Versamark ink.  Add black embossing powder and heat set.
  • Next die cut the Santa with the coordinating die.
  • Add foam tape to the back of the Santa and adhere to the card base.
  • Stamp the sentiment (also in the Santa Post Card set) with Versamark ink.  Add black embossing powder and heat set.
  • Trim the sentiment into a strip, add foam tape to the back, and adhere to the card.

This card was lots of fun to make, and it's a good way to use the glitter in my stash!  Thank you so much for stopping by today!  Have a wonderful week!


Wednesday, December 1, 2021

Merry Mail Christmas Card | Honey Bee Stamps

Happy December friends! I cannot believe it's already December, but I'm happy there's still lots of time to make our Christmas cards! My card today features the beautiful Honey Bee Stamps Merry Mail stamp set and coordinating Honey Cuts.  I had so much fun creating my scene for the mailbox, I kind of forgot about adding any sentiment! Haha! Keep reading to see which set has the perfect small sentiment that fit just right!

First I created my card base and layer. I inked up some 80# Neenah with my favorite wintery sky Distress Oxide Inks. I used a Detail Blender brush to blend on Chipped Sapphire, Faded Jeans and Stormy Sky in a random pattern. Next I die cut the panel with the Northern Star Cover Plate die. Then I used the second largest Sweet Stacks: Rectangles die to cut it down. I added some splatters of Confetti White Perfect Pearls with a paint brush and water. I adhered it to a top-folding A2 card base with Bee Creative glue.

To add to the background scene I die cut green card stock using the Pine Trees Honey Cuts. I added some Rustic Wilderness Distress Ink around the edges of each tree with a Blender Brush. Next I die cut white card stock to create the hills and fence using the Horizon Slimline Borders Honey Cuts. I trimmed them to 4" and arranged the trees, fence and two hills. Once I had them the way I liked, I used Bee Creative glue to adhere them all but for the top hill, which is popped up with foam tape. I added a line of glue along the top edge of the hill and sprinkled on some coarse glitter for a bit of sparkle.

Next I stamped all of the images from the Merry Mail stamp set with Intense Black Ink. (I usually just stamp everything so I can pick and choose the elements I want as I create my card.) I stamped two each of the pine branches and berry branches. Then I colored them all with my Copic markers. I used the coordinating Honey Cuts to cut them out. Now for the fun part of arranging them all! I trimmed off the bottom of the mailbox post to make it fit the perspective of my scene and popped it up with some thin foam tape. The mailbox flag is also popped up with foam tape. Before I adhered the gifts and mail to the mailbox, I trimmed off the white edge on the left side to give it a more seamless look with the mailbox.

Once everything was adhered, I added Glossy Accents to the berries. I used a black pen to add details to two of the gifts and a clear glitter pen for some sparkle. AND, it was at this point I remembered I forgot to plan for a sentiment! Haha! Well, the small sentiments from the Tag, You're It: Holidays came to the rescue! I stamped one of the sentiments with Intense Black Ink and used the coordinating Honey Cut to cut it out. Having coordinating dies for the sentiments makes it so easy to put your sentiment on your finished card!!!

I hope I've brought some inspiration to you today for your Christmas cards. I always appreciate you so much for stopping by! Have a wonderful, crafty day!