Pages

Thursday, November 26, 2020

So Blessed By You Bridge Fold Card | Honey Bee Stamps

 Hello my friends!  If you are here in the US, happy Thanksgiving!!  I'm pausing, briefly, my Christmas card making to share a card I made that reflects my feelings this day.  I've used Honey Bee Stamps beautiful Farm Fresh Flowers stamps and Honey Cuts along with the Blessed stamp set and Honey Cuts, which is another awesome layering die from Honey Bee.


To create my bridge fold card, I began by taking a 5-½" x 5-¾" piece of white cardstock and scoring it on each end at ¾" and 1-½".  Next I used pieces of scraps I have from the Autumn Afternoon 6x6 paper pad.  I cut two 1-½" x 5-½" strips of the leafy paper and adhered them on each end of the white cardstock.  I reinforced the score line at ½".  The plaid paper is 2-¾" x 5-½".  I trimmed four thin strips of the gold paper and adhered them as shown in the photo.  I used the awesome Bee Creative Precision Tip Glue to adhere everything.  If you haven't tried this glue, I highly recommend it!


Then I stamped the florals from the Farm Fresh Flowers set in Copic safe ink and colored them with my markers.  This was easy and quick to color as I knew a lot of it would be covered with the sentiment.  I die cut the flowers with the coordinating Honey Cuts.

I used the Blessed stamp set and Honey cuts for the sentiment.  I die cut the base layer from vellum, the middle layer from white cardstock, and the top layer from some glitter paper in my stash.  I was really happy to find that I had some that coordinated perfectly!!  Gotta love it when that happens! Haha!   I adhered the layers together with Bee Creative Precision Tip glue.  I stamped the "so" and "by you" in black ink, trimmed them and layered each with more glitter paper.

I adhered the flowers to the card by adding some Bee Creative Precision Tip glue just to the edges of the flower bunch.  Once that was totally dry, I added foam squares to the back of the sentiment and adhered it over the flower bunch.  I added a few gem stickers from the Farm Fresh Holiday Gem Stickers to the plaid panel.


As challenging as this year has been in so many ways, the one thing I'm always thankful for is the people in my life!  We may not be gathering together like normal, but I'm trying to stay focused on the positives.  These are my family, friends, and even friends, like you all, that I've "met" through this thing we call social media! Whatever you may be doing today, I hope you have a wonderful day!  Thank you for stopping by!

Supplies:

Wednesday, November 25, 2020

Keeping Christmas Blog Hop - November 2020

 It's only ONE month until Christmas!!  That means it's time for the final Keeping Christmas Blog Hop of 2020!  I hope you have enjoyed these inspirational hops each month and have been inspired by the beautiful projects you've seen!  Be sure to read until the end to get to the hop list and see what beauties the ladies are bringing this month!


Now let me just say this.  When I saw Simon Says Stamp's release that included this beautiful Forest Border embossing folder, my fingers were flying to get my order in for this!  It is such a gorgeous embossing folder and made this card so quick and easy to make.


I began by making an A2 card base from some Stardream Crystal card stock.  I've had this forever and I'm surprised it's still available!  Next I inked up the recessed side of the embossing folder with white pigment ink.  I placed some dark blue card stock in the folder and ran it through my die cutting machine with the embossing folder sandwich.  I love this snowy effect!  I added more snow on the branches with a white gel pen.

I die cut Simon's Chunky Joy sentiment from the same papers twice and the base layer once.  I adhered the layers and added it to the card front!  Done!!

I'm also entering this into Simon's Flickr group current challenge #163--Holiday Cards!


Thank you so much for stopping by!  I hope you all have a very blessed Thanksgiving day, or just a blessed day if you aren't in the US, tomorrow!  Now be sure to check out these very talented ladies!

Kelly Lunceford (Creator)


Claire Broadwater


Lori Tecler


Nance Salkeld


Nina Forsyth


Marybeth Lopez


Nancy Penir

Sunday, November 22, 2020

Thanks For Everything! & Coloring Tips for Slimline Stamps | Rubbernecker Stamps

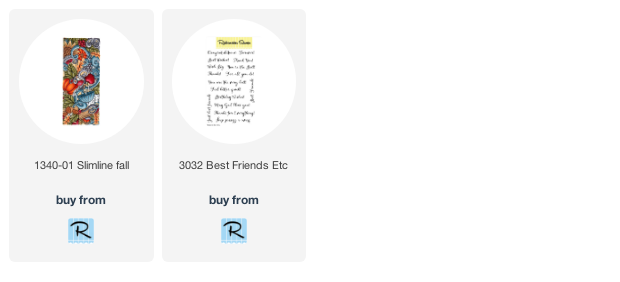
 Hello friends!  It's almost Thanksgiving and I have a card that would be perfect to give to a host or mail to anyone to say thank you!  I had so much fun coloring this beautiful Rubbernecker Stamps' Slimline Fall stamp.  This is a gorgeous slimline collage of autumn images!

Except for the time it takes to color the image, this card is very simple to make!  I'll be sharing some tips for coloring this style of image that helps me.  I hope you'll keep reading and let me know if these are helpful to you too!

Getting started:

  • Cut 80# Neenah card stock to 7" x 8-½" and score it at 3-½".  This creates a side-folding 3-½" x 8-½" card that will fit into a standard business size envelope.  No extra postage required! (In the USA.)
  • Stamp the greeting from the Best Friends, Etc. set with Versamark clear ink onto white card stock.  Sprinkle with gold embossing powder and heat set.  Trim it to about ½" x 3-¼".  Add foam tape and set aside.

Coloring tips:

  • This image can be colored with any medium you want such as colored pencils, watercolors, or alcohol markers.  I used my Copic markers to color this card and stamped it in a Copic safe ink.
  • My first tip is to choose the easily identifiable images and color those first.  I began with the pumpkins, then went to the green leaves, and then the golden brown oak leaves.  The more images you color, the clearer it all becomes!
  • I agonize a LOT over what colors to use, all the time!  I purchased a very inexpensive color wheel that helps so much!  I knew I wanted to stay with warm colors and this wheel helped keep me away from the cooler toned colors!

  • The ribbony tendrils and the background were the last things to color.  It really helped to see the tendrils when I colored in the background.  The next two photos show the before and after coloring the background.  (Note:  I used Copic B37 here.  When I was totally finished coloring, I decided I wanted it darker and went over it with a B39.)

  • My final tip is to stamp the image TWICE!  So I am showing you a NOT PRETTY image here!  Haha!  I use that second image to test out colors and color blends.  This sure helps prevent making huge mistakes on the original image!  You can see where I almost went over to the "cool" side of the color wheel on the tendrils (lower left side).  While these are my usual go-to greens, these definitely didn't fit in with my other color choices!

  • To complete my card, I trimmed my colored panel to 8-¼" x 3-¼" and adhered it to the card base.  Then I added the sentiment strip towards the bottom of the card.

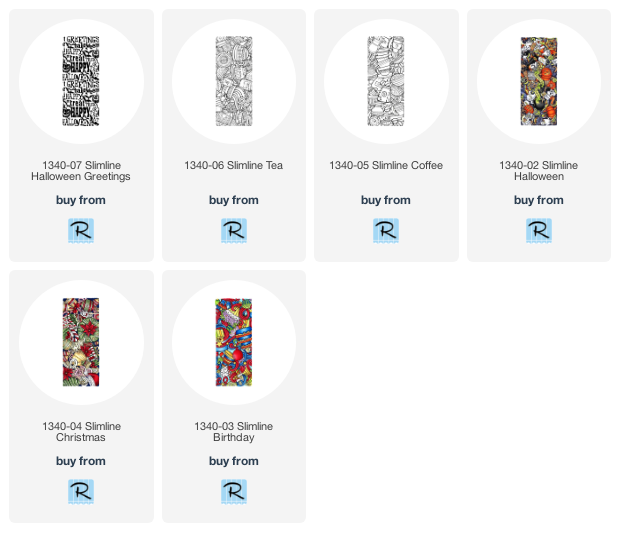
Rubbernecker has several of these beautiful collage sets that I've linked below.  I hope these tips are helpful to you and that I've inspired you to give this beautiful stamp set a try!  Have a wonderful, and crafty, week!

For this card I used:

Other beautiful slimline stamps from Rubbernecker:

Thursday, November 19, 2020

Scrapbook.com Handmade Holiday Paper Crafting Parade 2020

 Hello!  I super excited to be joining in Scrapbook.com's Paper Crafting Parade 2020!  If you've stopped by here from my Instagram, thank you!

First of all, I would like to say THANK YOU very much to Scrapbook.com for the box of goodies!  I used a lot of the items I received on my girlie Christmas tag here.

To create my tag, I die cut the fourth largest Nested Tags die with my Spellbinders Platinum die cutting machine.  Then I placed the Little Rainbows stencil over it.  I used some, new to me, Mint Tape!  This tape is really awesome for holding dies in place--I like it a lot!  I also received Scrapbook.com's Ink Blending Tool with domed foam applicators.  I used one to ink up the stencil with Distress Inks in an ombré hue with Spun SugarWorn Lipstick and Abandoned Coral.  I really do like this tool!  The rounded foam applicator really does help with the blending!

Keeping the stencil in place, I smoothed some Nuvo Moonstone Glimmer paste over the stencil.  I love the sparkle this adds!  Set the tag aside to dry.  Be sure to clean your stencil and tools immediately!


Next I used a piece of pink card stock from the Floral Smooth Cardstock paper pad to die cut the Rainbow Wishes shape die.  I clipped the rainbow from the banner bottom and used the ink blending tool to add some Distress Ink to each piece for shading.  I added a Double Sided Adhesive Sheet to a piece of white card stock and die cut the Rainbow again.  I removed the backer piece and adhered the rainbow to it.  I sprinkled iridescent glitter on the bottom.  I stamped Merry Christmas from Honey Bee Stamps Santa's Village in Worn Lipstick Distress Oxide, then in Versamark.  I heat embossed clear sparkle embossing powder on it, heat set it and die cut it with the banner die in the Rainbow set.  I stamped the Concord & 9th Snowflake Kisses sentiment in the same way.

I die cut some snowflakes from Honey Bee Stamps Layering Snowflakes die set, added sparkle to them with a Glitter Brush Marker. I adhered the layers together with some glue.  I used Scrapbook.com's Foam Squares to pop up my tag elements and adhered them to the tag.  I finished off my tag with ribbon and a jingle bell from my stash.

Thank you so much for stopping by!  Be sure to go to my Instagram and click the next person in the parade!  You will see lots of fun holiday paper crafts to inspire you!


Wednesday, November 18, 2020

Holly Jolly Christmas Slimline Card | Honey Bee Stamps

 Happy Wednesday!  Today I'm sharing a slimline card I made using Honey Bee Stamps Santa's Village stamps and Honey Cuts.  This card was easy to make so I'm keeping the chatter down and sharing a lot of photos for you!


For this card I've only used the Santa's Village set and the Horizon Slimline Borders Honey Cuts   Santa's Village stamp set is HUGE and you can do so much with it.  You can use a lot of images like I did, or select a few and make a smaller scene.


I made a large slimline card that will still fit in a business sized envelope.  It measures 9-¼" x 4", which was the perfect size for my scene!  I stamped all of the images in Copic safe ink and colored them with my Copic markers.  I fancied Mrs. Claus up a bit with a black Micron pen and a white gel pen, adding eyelashes and detailed to her apron and dress.  I die cut them all with the coordinating dies.


I die cut the hills from the Horizon Slimline Borders Honey Cuts.  Then I used a Background Blender Brush and inked on some Tumbled Glass Distress Oxide just on the edges.  I also used a few brushes to add a sky to my background with Faded Jeans and Chipped Sapphire Distress Oxides.  This is my FAVORITE winter sky combination!


I adhered all of the background images with Bee Creative Precision Tip Glue.  (P.S.: This is the first glue with this tip of those that I've tried and has not clogged!)   The hills at the bottom are adhered with glue for the top one and thin foam tape for the one at the bottom.


All of the images in the foreground are adhered with either thin or thick foam tape.  After I had those down, I tucked in a few more trees.  I also adhered the sentiment with foam tape near the top edge.  I love how Honey Bee has dies to cut out the sentiments!


Here is some advice if you make anything like this:  Add the Nuvo Fresh Snowfall Glitter Accents to the hills BEFORE you put them on the card!  LOL!  It worked out fine, but was a bit tedious to make sure I got it just where I wanted it.  I also added these pretty gems to the trees that are in the Holiday Cheer Gem Stickers.


I had so much fun coloring the images for this card!  Did you see my daily posts on Instagram?  I was seriously entertaining myself!  LOL!  Thank you so very much for stopping by!!

Supplies:

Thursday, November 12, 2020

Scenic 3D Holiday Lantern | Honey Bee Stamps

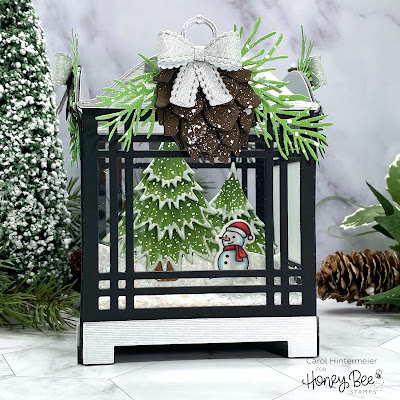
Happy Thursday friends!  I want to share with you how I've used the Honey Bee Stamps Lantern Builder A2 Honey Cuts to make a decorative 3D lantern!  I love the decorative lanterns that you see in shops with scenes inside them and was inspired to give this project a try.  This was so much fun to make!  I have detailed directions on how to create the lantern, so keep reading!


Here are the directions for creating the four-sided lantern:
  • Die cut eight lanterns from the Lantern Builder A2 dies with black card stock.
  • Adhere acetate and vellum to the back of the lantern window openings.
  • Adhere the extra lantern die cuts to the back of these to hide the edges of the acetate and vellum.
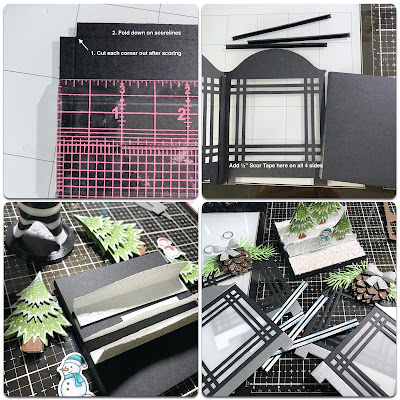
  • Cut four ½" x 4-¼" strips of black card stock.  Score in the center and fold.  Add 1/8" Scor-Tape to each side of the tab.  These will be the tabs to join the lantern die cuts into a four-sided lantern.  Adhere one tab strip to the left side of each lantern side.
  • Add ½" Scor-Tape to the inside of the lantern sides just below the window openings.
  • I die cut eight decorative lantern top pieces and four of the bottom leg pieces from THIS silver card stock. I adhered four of the tops to the inside of the lantern sides with BEE Creative glue.  I popped up the remaining tops and leg pieces with thin foam squares and adhered them to the outside of the lantern sides.
  • Cut a piece of black card stock to 4-9/16".  (I know that's an odd size but it will fit inside the lantern as a base for the scene.)  Note:  Cut white card stock to fit the top of this now and adhere.  I forgot and had to piece some on the base.
  • Score each side of the base at ¼".  Trim out the square screwed by the score lines at each corner.  (see photo)

Before assembling the lantern, I need to create my images for the inside and decorations for the outside of the lantern:  (all products are linked at the end of this post.)
  • Die cut tree pieces from green card stock.  Die cut double the amount of layers for the number of trees you want in order to make them double sided.  The trees I used are from the Toy Store House Builder Add-on Honey Cuts.  I added shading with two Copic markers, white gel pen dots for snow, and Nuvo White Crystal Drops for the snow on the edges.  Let dry.
  • I adhered the tree layers with glue at the tops and thin foam squares at the bottom edge of the layers for dimension.  Take two trees of the same size and place them back to back.  Add glue just to the top to adhere them together for a two-sided tree.
  • I die cut enough pinecone layers for four with the Lovely Layers: Pinecone and each pine sprig four times.    I die cut four bow pieces each from silver glitter paper in my stash.  After adding white paint splatters, I assembled the pinecones and adhered them and the pine sprigs to the lantern sides.  I glued the assembled bows to the top of the pinecones.  Then I added them to the lantern with foam squares.
  • Using the Hill Border Honey Cuts, die cut the hills.  I used THIS specialty paper and backed the hills with white card stock for more stability.
  • Score the hills horizontally along the bottom to create a flap and adhered to the lantern base.  Where you score them depends on how high you want your hills.
  • Take the trees, add glue to the bottom inside, and slip them over the hills to adhere.  You should have one on both sides of the hill.
  • I stamped two snowmen from the Toy Store House Builder Add-on stamp set, Copic colored, and die cut them with the coordinating Honey Cut.  I attached them to the hills with foam squares.
  • The photo above shows all of the pieces and parts just before assembling.

To assemble the lantern I removed the Scor-Tape from the lantern side tabs and began joining the sides.  When I had two sides joined, I began adhering the lantern base by removing the Scor-Tape that is just below the windows.


When I finished assembling the lantern, I sprinkled in some iridescent "snow" to complete the scene.  Here are more photos for you to see.


I know this was a long post, but I tried to keep it as succinct as I could.  If you have any questions at all about creating this, please use the "contact me" box in the left column of this blog.  Thanks so much for stopping by!

Supplies:

Sunday, November 8, 2020

Thanks for Being You! | Rubbernecker Stamps

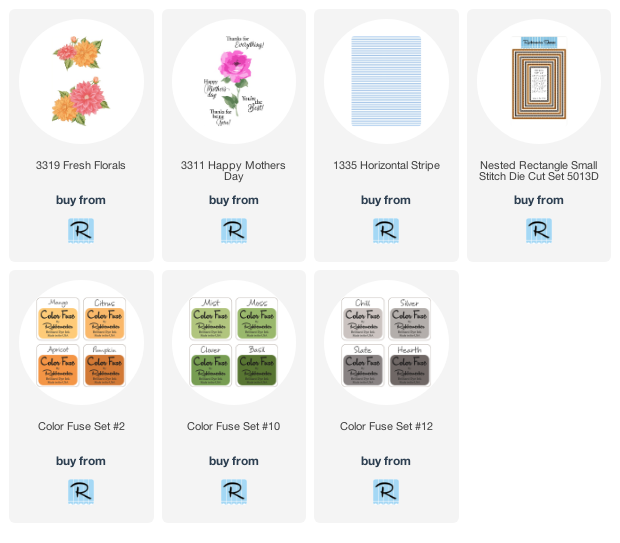
Hello my friends!  Today I have a thank you card using Rubbernecker Stamps Fresh Florals layering stamp set.   This set is so beautiful and depending on the colors you use, it can be used for any season!  I wanted gingham on this card and didn't have any in my stash to use.  I finally had the idea to use the Horizontal Striped Background stamp and create my own!  Read on to learn how I did this!

Card base:
  • Die cut black card stock with the largest Nested Rectangle Small Stitched die and white card stock with the next to largest.
  • Adhere the die cut layers to an A2 top folding card base.
  • Create the gingham:  Stamp the Horizontal Stripe background stamp in Versafine Onyx Black ink onto white card stock.  Rotate the stamp 45º and stamp in Hearth ink (from Color Fuse set #10).  Ta-dah!!  Gingham!  This is so easy and just about any combination of ink colors can be used!
  • Die cut the stamped gingham paper with the next to largest Nested Rectangle Stitched die.  Trim the piece to 1" tall, keeping the stitching on each end.  Adhere to card base.

Flowers:

  • Using the layering stamps in the Fresh Florals set, ink the first layer of each flower in Citrus.  Let the ink dry.  Then ink the subsequent layers in Mango, Apricot, and Pumpkin.  These inks are in Set #2.
  • Here's a tip:  to be sure to get that final layer positioned correctly, lay a piece of acetate over the stamped images.  Then stamp the next layer to see if the stamp is in the correct place.  If it's not, (as you can see in the second photo) wipe off the acetate, reposition the stamp and try again!  (Of course, you can do this with any layer you want to check.)  Click on any photo to enlarge.

  • Ink the leaf layers in Clover and Basil.  Ink the Basil a second time to intensify the color.
  • Die cut the flowers and leaves with the coordinating Fresh Florals dies.
  • Lay out the flowers and leaves on the card base to decide where to stamp the sentiment.  The sentiment used is from the Happy Mother's Day set and is stamped in Versafine Onyx Black ink.
  • Adhere the medium and small flower with liquid glue to the card base.  Add foam tape to the large flower and adhere.  Either glue or pop up the leaves around the flowers.

I love how the gingham turned out and think it really adds a fun autumn vibe to my card!  Thanks so much for stopping by!


Friday, November 6, 2020

I Just Need Coffee! | Rubbernecker Stamps

 I don't know about you, but when I first wake up, I need coffee!! Haha!  Rubbernecker Stamps is a "super sponsor" of the Fall/Winter Coffee Lovers Blog Hop and there is so much inspiration for coffee/tea themed cards and lots of prizes on this hop!  Be sure to go over to Rubbernecker Stamps blog for all of the info and much more awesome inspiration!

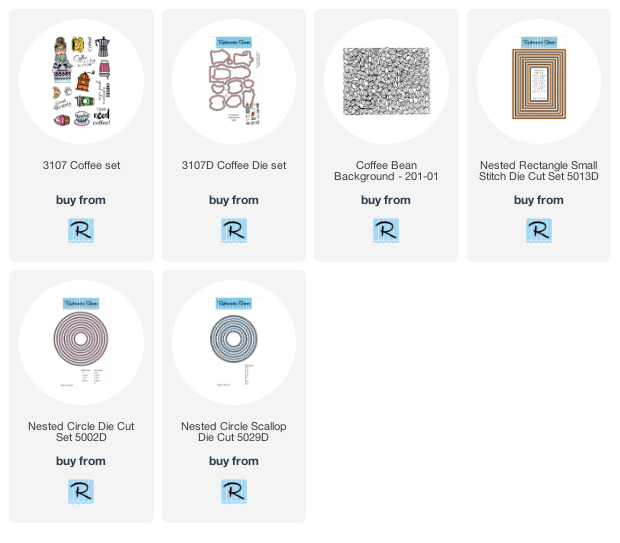
My card features a few images from the adorable Coffee set by Rubbernecker.  I'm short on time this week, so I've made a CAS card (which I rarely do!)  (All product links are at the end of this post.)

Steps for the card base:

  • On a piece of Neenah Desert Storm card stock, stamp the Coffee Bean background stamp in Versamark clear ink.  Sprinkle on some clear embossing powder and heat set.
  • Die cut it with the largest Nested Rectangle Small Stitched die.
  • Ink the edges with Walnut Stain Distress Ink.  Wipe with a dry towel to remove excess from the embossing.
  • Adhere to a top-folding A2 card base.

Card elements:

  • Stamp the coffee cups in Copic safe ink and color.  Die cut them with the coordinating dies.  Add foam tape to the back.
  • Using a stamping tool (I use the MISTI) stamp the sentiment with Walnut Stain Distress Oxide ink.  Leave it in the MISTI.
  • Clean the stamp and re-stamp with Versamark clear ink.  Sprinkle on clear embossing powder and heat set.
  • Trim the sentiment and and adhere it to a matting layer inked with Walnut Stain Distress ink.
  • From white card stock, die cut three each of the second to smallest Nested Circle die and Nested Circle Scallop die.
  • Ink the Circle Scallop dies with Walnut Stain Distress ink.
  • Adhere the Circle die cuts onto the inked Circle Scallop dies.  Add the coffee cups to these.
  • Adhere the coffee cups and sentiment.

Thanks so very much for stopping by!  Be sure to go to Rubbernecker Stamps blog for all of the hop and prize information!


Thursday, November 5, 2020

Honey Bee Stamps Holiday Cheer Blog Hop

 Hello and welcome to the Honey Bee Stamps Holiday Cheer Inspiration Blog Hop!  There are several stops on the hop with designers  featuring projects using the new and so awesome Holiday Cheer release.  

There is a HUGE prize for commenters!!  Honey Bee Stamps will be giving one commenter a $100 gift card to shop at their site!!  WOOHOO!  You should have arrived here from so amazing Brenda Noelke's blog.  Keep reading to get to the full hop list at the end and be sure to visit each stop along the way and leave your comments!

My card features the beautiful Happy Hanukkah stamps and Honey Cuts.  (Click on the product links to check them out!)

I created a 5" x 7" card base and layered the Plaid A7 Layering Cover Plate Top and Base Honey Cuts on top.  I die cut these from 80# Neenah Solar White card stock.

Next I stamped the images in Copic safe ink and colored them with my Copic markers.  Then I die cut them with the coordinating dies.

I stamped the sentiment in some blue ink, and while it was still in my MISTI, I stamped some Versamark clear ink onto it.  I sprinkled on some clear embossing powder, heat set it, and die cut it with the coordinating die.  

Next I die cut a piece of vellum with the next to largest A7 Double Stitched Frames and adhered the images and sentiment to it.  I added dots of liquid glue to the vellum only behind the images and adhered it to my card.  I added a few Crystal Clear Hearts for a bit of shine!  Always need a bit of sparkle and shine!!!

Thank you for stopping by and be sure to leave a comment here for your chance to win that $100 gift card!  The winners will be announced on Sunday, November 8 on Honey Bee Stamps blog.  There's an Instagram hop in progress too!  If you want to get started on that hop (a separate prize is there) click HERE.

Now head to the next stop--the so talented Becky Roberts!

Sunday, November 1, 2020

Divinity Designs November Release

 Hello my friends!  I'm back for another guest designer post using Divinity Designs November release.  There are adorable gnomes, a snowman, and other wintry products that are so fun for creating your winter/holiday cards and projects in this release!

I've listed the product used for each card below the card with a full list of their November release and links at the end of my post.

My first card uses the Snowman & Friends stamp set.  I absolutely love snowmen stamps and this one is so adorable!!


I colored the snowman scene with my Copic markers.  I used the Squares dies along with the new Birch Background die to create the card.  I chose one of the four sentiments and die cut it with an Oval die after stamping it.


The new Gnome for the Holidays set has three different gnomes, but I chose to feature just one of these cute little guys for this card.  This time, after I die cut and embossed the Birch Background die  I left the die cut in the die and added some gray ink over the die to highlight those embossed areas.  I also use the Christmas Collection 2020 paper and Pierced RectanglesOval die, and Pierced Ovals to finish the card.


I love the beautiful wintery scene of the Sending Merry Mail stamp set.  I Copic colored the image then stamped the sentiments with Versamark and heat embossed in white.  Other products used are Pierced Ovals and Pierced Rectangles.

Thank you so much for stopping by!

Divinity Designs November release: