Pages

Tuesday, September 29, 2020

National Coffee Day Blog Hop | Rubbernecker Stamps

Hello friends!  Today Rubbernecker Stamps is part of the Coffee Loving Cardmakers National Coffee Day Blog Hop.  There are many sponsors in this hop so be sure to check them out!

For my card today I've used a new set from Rubbernecker called Coffee Girls.  There are two main images and several sentiments perfect for making your "coffee" cards!  I love this image and can just imagine how peaceful it would be to sit on a dock at a lake with my morning coffee!


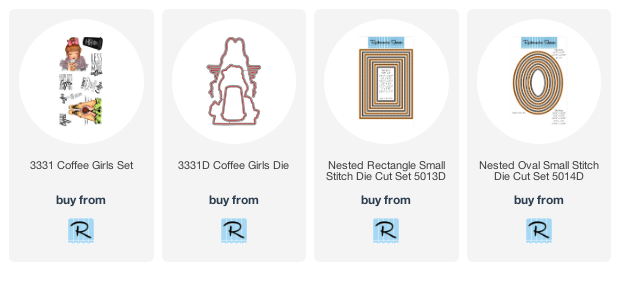
This was a quick card to make--the best kind, right?!!  I colored the image with Copic markers (colors are listed below) and die cut it with a Nested Oval Small stitch die.  I added foam tape to the back.


I added the image to an A2 card base with patterned paper layers from Honey Bee Stamps Great Outdoors paper pad.  The green patterned layer is die cut with a Nested Rectangle Small stitch die.  I stamped the sentiment and used my trimmer to cut it out.  I also popped this up with foam tape.  For a bit of shine I added Glossy Accents to the coffee and a few clear green dots from my stash.

Thank you so much for stopping by!  Be sure to go back to Rubbernecker's blog to see much more fabulous inspiration.  

Copic markers:

B0000, B21, B24, B26, BG11, BG13,
E11, E21, E23, E27, E29, E47, E49, E50, E51, E59, E84, E87, E89,
G99, R30, R32, YG95, YG97, YR20, YR21, YR23, YR24

Sunday, September 27, 2020

Floral Layering and Inky Backgrounds | Rubbernecker Stamps

Happy Sunday friends!  Today I have a two-for-one set of cards using Rubbernecker Stamps' beautiful, new Just Because stamp set and coordinating dies.  I had so much fun making the inky background for the slimline card.  I had only planned on making this one card, but as I was cleaning up I noticed how the single flower looked so pretty with the embossed sentiment, so I made another card!

Here are the steps for my slimline card:

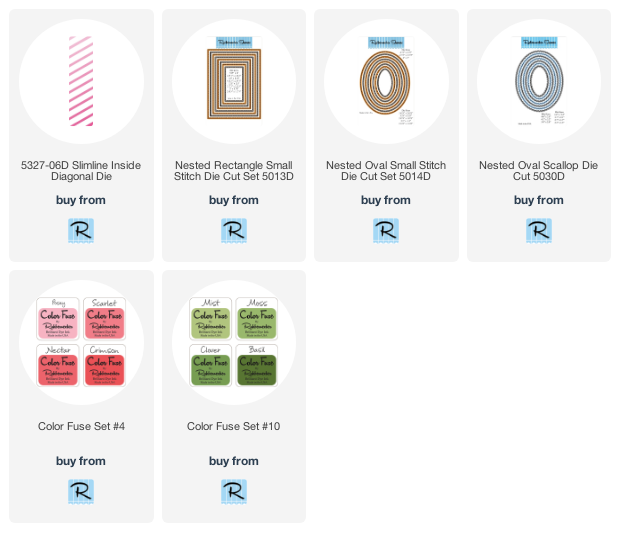
  • Die cut a piece of watercolor paper with the Slimline Inside Diagonal die.
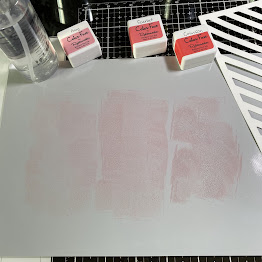
  • Now for the fun, inky part.  Ink some Posey, Nectar, and Crimson ink onto a craft mat.  (These are in Color Fuse Set #4.)
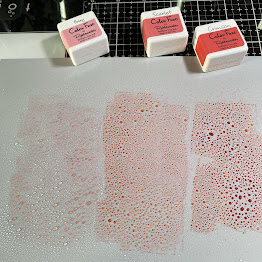
  • Spray the ink lightly with water.  The more water you add, the more dilute your colors will be.  As you can see from these photos, I sprayed just enough water for the inks to bead up.

 
  • Take the die cut Inside Diagonal piece and dip it into the inks.  I repeated this until I had the look I wanted.  Be sure to use your heat tool to dry between each time you put it into the ink so you can get the textured looking layers.  Set it aside to dry thoroughly.
  • Next I stamped the flower layers in the Just Because set.  Again, I used Posey, Nectar, and Crimson.  I stamped four flowers.
  • Stamp the leaves and stems with Moss, Clover, and Basil from Set #10.
  • Die cut the flowers and stems with the Coordinating Die set.
  • Next I stamped two sentiments from the set with Versamark ink onto black card stock.  (Be sure to use an anti-static bag before stamping so you don't have white embossing powder stuck everywhere!)  I added white embossing powder and heat set it.
  • I trimmed "Thinking of You" into a strip, added a white layer, and foam tape to the back.
  • Die cut one Nested Oval Scallop die from black card stock.
  • Die cut one Nested Oval Small Stitch die from white card stock.  Center and adhere this to the black scalloped oval.

Assemble the card:
  • Adhere the diagonal stripe water color piece to a slimline card base (3-½" x 8-½").
  • Adhere the oval layers.
  • Arrange the flowers to your liking and add foam tape to the back of them.  I crossed the stems near the bottom and added some black and white twine tied into a bow.
  • Adhere the flowers to the ovals.
  • Attach the sentiment to the card.  I added some black gem stickers for a touch of bling.


My bonus card was super quick and easy since I had the flower and sentiment already done!

  • Die cut some 80# Neenah with the largest Nested Rectangle Small Stitch die.
  • Ink the edges of this with Crimson ink using an ink blending brush.
  • Attached it to an A2 top-folding card base.
  • Die cut 80# Neenah with the next-to-largest Nested Rectangle die.
  • Add spatters in various colors.  I smooshed a bit of Nectar ink onto my craft mat, added a bit of water with a paint brush and tapped the color from the brush onto the card.
  • The other colors are diluted black acrylic paint and Gansi Tambi Starry Colors Champagne Gold.
  • When the spatters are dry, add foam tape to the back and attach it to the card base.
  • Add foam tape to the back of the sentiment panel and the top of the flower.  Attach these to the card.
  • I added Champagne Gold dots to the black layer.

I hope I've inspired you have some inky fun with these beautiful flowers!  Thank you so much for stopping by and have a wonderful, crafty week!


Friday, September 25, 2020

Keeping Christmas Blog Hop - September 2020

 Welcome back to the monthly Keeping Christmas blog hop!  Have you started your holiday cards?  Just a reminder that it's only three months until Christmas!


I was so happy to finally get to use this ADORABLE set called Holly Bird from Waffle Flowers!  I love birds, and bird stamps, and snapped this one up as soon as it was released!  What is cuter than a sweet bird holding a warm cup of coffee or hot chocolate?!!


I began by stamping the bird with InkOn3 Fadeout No-line Coloring detail ink.  I'm trying to practice no line coloring as often as I can.  If you haven't seen this stamp, it stamps the the hexagon and the bird all together.  The coordinating die cuts out just the bird.

I colored just the bird with my Copics, then die cut it.  I used my B39 Copic to color the white border that die cuts usually leave.  I stamped another image with InkOn3 Blackout Detail Ink (which is Copic safe and stamps nice and dark images).  I used some blue Copics to color just the background.  It was super easy as I used my paper trimmer to cut the hexagon shape and popped up the colored bird image over it.


For the card base, I started with a top folding A2 card.  I added a coordinating blue layer cut to 4" x 5-¼".  I used one of my most favorite EVER embossing folders--Sizzix 3-D Winter Snowflakes for the next layer.  I adhered the bird to the card.

Next I added Glossy Accents to the coffee/hot chocolate and berries.  Then I used a .08 white Jelly Roll pen to add snowflake dots and a clear sparkle pen to add shimmer to the hat and more dots to the background.  I wish it was easier to capture all the shimmer in a photo!

I colored a scrap of white card stock with the same dark blue Copic (B39).  When it was dry, I stamped the sentiment with Versamark, added white embossing powder and heat set it.  I used a Sentiment Banners die to do partial die cutting to the length I wanted and popped it up with small foam squares.


Thank you so much for stopping by today!  Be sure to check out these talented designers in the list below for what I know will be some wonderful inspiration!


Kelly Lunceford (Creator)

Claire Broadwater

Lori Tecler

Nance Salkeld

Nina Forsyth

Marybeth Lopez

Nancy Penir

Carol Hintermeier <--that's me :)

Wednesday, September 23, 2020

Honey Bee Stamps "Autumn Afternoon" Blog Hop Day 2

 Hello friends, and welcome to Day 2 of Honey Bee Stamps Autumn Afternoon blog hop!  I hope you were able to catch all of the amazing projects from Day 1 of the hop.  If not, click HERE to get started.  There will be a $25 gift card for each day of the hop--but you need to hop and leave comments for your chance to win!

Now, on to today's hop.  You should have come from the so talented Amy Tsuruta, and you will find the complete hop list for today below.  For my card today, I used the SO beautiful Hello Fall stamps and Honey Cuts.

I'll keep my description brief as I know you need to keep hopping!  For all of the leaves and stems I used my MISTI.  I placed them onto the door and used finger daubers to add various Distress Oxide Inks to the stamps. I used these Oxides:  Mustard Seed, Fossilized Amber, Aged Mahogany, Peeled Paint, Crushed Olive, Forest Moss, and Vintage Photo.  I lightly misted them with water and stamped them onto Bristol Smooth card stock.  When they were totally dry, I stamped the stems/leaf veins in Versamark, added gold embossing powder and heat set them.  I also gold heat embossed the sentiment from this set and cut it with the coordinating Honey Cut.

"When I count my blessings, I count you twice"!  Y'all this sentiment is one that I will use many times, on the card front, and also perfect for the inside sentiment! 


After I die cut everything, I arranged and adhered them with the Copic colored pumpkin (from last year's awesome Fall Bouquets Honey Cuts).  I added this to a card base I created with the A7 Double Stitched Frames Honey Cuts, Scallop A7 Card Frames Honey Cuts, and a strip of paper from the Harvest Festival paper pad.

I love every product in the Autumn Afternoon release!!  Do you have a favorite?

. . . . . . . . . . . . . . . . . . . . . . . . . . . . . . . . 

In case you missed my sneak peeks over on my Instagram, I have the photos with the links for the Honey Bee products I used.  If you want to see them close up, just click the photo to make it larger.


Bee Cool stamps & Honey Cuts (free bee); Hexi Slimline Cover Plate Base &
Bottom Honey Cuts; Raw Honey Gem Stickers


. . . . . . . . . . . . . . . . . . . . . . . . . . . . . . . . 

Thank you so much for hopping by, and don't forget to leave a comment for your chance to win that gift card!  Have fun hopping along!

Honey Bee Stamps

Kelly Latevola

Channin Pelletier

Lisa Mensing

Leanne West

Amy Tsuruta

Carol Hintermeier <---that's me!

up next ---> Laura Bassen 

Becky Roberts

Emily Midgett

Thursday, September 17, 2020

Jack-o-Lantern Patch Surprise Card | Honey Bee Stamps

 Happy Thursday my friends!  Today I have a fun surprise slider card using Honey Bee Stamps Pumpkin Patch, The Name's Jack, and FaBOOlous Sentiments.  This is the first surprise slider card I've ever made and I really had fun with it!


And the fun part when the tab is pulled up!

Let's create the fun elements of the card:

  • Using a 4" x 5-¼" piece of white card stock, the cloud stencil from the Outdoor Scene Builder stencil set, and Background Blender brushes, blend Distress Oxide Inks to create the clouds.  I used Wilted Violet, Seedless Preserves, and Black Soot.
  • Use a ½" circle die to cut a half circle from the center of the top edge.  Save the die cut half circle and stamp "pull" on it with clear embossing ink, add white embossing powder and heat set.  You will find "pull" and many other great interactive sentiments in the One-Of-A-Kind stamp set.
  • Die cut some bats from the Haunted House Add On die set using glitter card stock.
  • Die cut green card stock with the Grass Border Honey Cut.  Stamp the sentiment from the FaBOOlous Sentiments set in Versamark, add black embossing powder, and heat set.
  • Stamp pumpkins, leaves and vines from the Pumpkin Patch set.  Use the Pumpkin Patch stencil and Distress Oxide Inks to color them.  I used a Blender Brush and Crackling Campfire, Carved Pumpkin, Spiced Marmalade, Mowed Lawn, Twisted Citron and Vintage Photo Distress Oxide inks.  I used the jack-o-lantern faces from The Name's Jack and stamped them onto the pumpkins with black ink.  Die cut them with the coordinating dies.
  • Die cut the ghost from The Name's Jack die set.  Stamp a ghost face stamp from the coordinating stamp set in black ink.  Die cut two of the little arms and add glue just to the top edge.

Before I worked on the slider portion, I needed to get my pumpkins arranged to make sure they would cover the ghost in its hidden position.  When I had them arranged, I put a piece of Press N Seal over them, flipped it over, and used the Bee Cre    ative glue to adhere them where they overlapped.  Trim any pieces that overlap the 4" base.

To create the slider channel, I used my craft knife and cut a 3/8" channel in the cloud base. (I did some researching on Pinterest and YouTube for ways to do this.)  If you have Honey Bee's Straight Interactive Slider dies, this would be very easy!  (This set is in my wish list!)

I die cut two ½" circles with a die from my stash.  Add a round foam circle to one die cut circle, place it under the channel, and adhere the other circle on top.

Sit your pumpkin scene on the cloud layer (without adhering) and decide where the ghost needs to be so it will be hidden behind the pumpkins with the pull strip down. Adhere the ghost to the top die cut circle.

Cut a ¾" x 4" strip of white card stock and adhere an end of it to the circle on the back.  Trim any extra even with the top of the card layer.  Add foam tape on either side of the strip to keep it steady when pulling up.

Pull the strip up and stamp EEK, from the FaBOOlous Sentiments set, in black ink.

Stamp BOO on black card stock with Versamark, add white embossing powder and heat set.  Trim it to a rectangle shape and adhere under the ghost's arm.

Adhere the half circle that says "pull" to the top of the strip.  

Add foam tape around the edges of the cloud layer and secure it to a top folding black A2 card base.

I finished it up by adhering the bats and adding Glossy Accents to the eyes and mouths of the pumpkins and ghost.


Tuesday, September 15, 2020

Copic Coloring Woodland Animals #3 | Rubbnecker Stamps

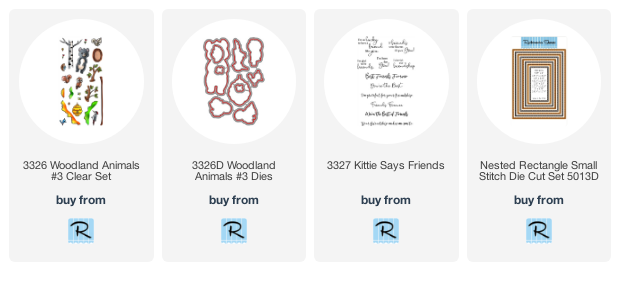
Hello friends!  Today I have a sweet card using Rubbernecker Stamps new, and so adorable, Woodland Animals #3 stamps and coordinating dies. The stamp set has stamps that let you build your tree and shrubs in just about any shape you'd like!


Here are the steps for my card:
  • I used Copic safe ink for all of my stamping.
  • Stamp one of the branches first.  Then ink up just the top half of this branch and stamp it again to extend the branch.  I used a black Micron pen to draw links to join the pieces.
  • Stamp the bottom of the same trunk onto masking paper.  Fussy cut it out and adhere it to the stamped image.
  • Stamp the tree trunk.  There's only one stamp for the trunk so I just flipped it around to stamp the other side.
  • Mask off the bottom of the tree trunk and stamp the shrubs.  There are four different tree/shrub stamps that you can use however you like.
  • Next I stamped the the shape for the tree.  All of the black lines you see in the tree top are stamped images.  How fun is that?!!
  • Stamp a few of the flowers at the bottom.
  • I colored the tree, shrubs and flowers next.  I used spots of color to create my textured look.  Just start dabbing your darkest shade wherever you want the shadows.  Use lighter shades as you get to the outside edges.  I've listed all of my Copic marker colors below for your reference.
  • When the blue sky is dry, stamp the sentiment from the awesome new Kittie Says Friends set in Versafine Onyx Black ink.
  • Die cut the panel with the next to largest Nested Rectangle Small Stitch die.
  • For a little extra detail, I embossed the largest Nested Rectangle die onto my A2 card base front.  Just use the embossing sandwich for your machine.
  • Add foam tape to the Copic colored panel and adhere to the card base.
  • Stamp the bear, owl, and bees on a separate piece of white card stock and color with Copics.
  • Die cut them out with the coordinating dies.  (I LOVE having dies to cut out these cuties!)
  • Add some foam squares to the pieces and pop them up on the card front.

This scene was SO fun to create!  The Woodland Animal Sets are so adorable and fun to use.  I'll definitely be using these a lot!  Thank you very much for stopping by!

Copic markers:
tree and bushes: YG67, YG17, YG25, YG23, YG01, E97, YR27
owl: W7, W5, W3, W1
tree trunk: E18, E17, E15
bear: E27, E25, E23, E13, E11

Sunday, September 13, 2020

Celebrate Autumn: Layering Stamps with Embossing | Rubbernecker Stamps

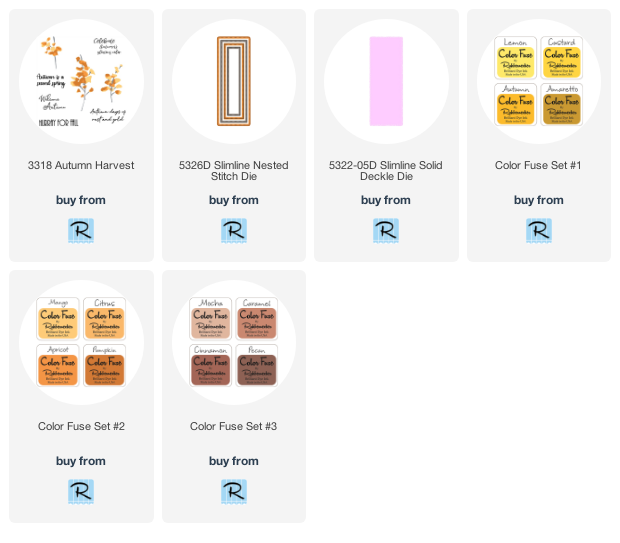
Hello friends!  Today I've added a twist to using layering stamps by embossing the final layer!  I've used Rubbernecker Stamps' beautiful Autumn Harvest stamp set for my slimline card today!

Here are the steps for my autumn card:

  • I began by centering one of the Slimline Nested Stitch dies (the second largest) in the middle of the Slimline Deckle Die.  Use tape to keep them together.
  • Trace a pencil line around the inside of the rectangle.  (see photo) Be sure to keep them together as we will use them later for die cutting.


  • I roughly planned where the branches would go, using the pencil line as my guide, so I would know where to stamp my sentiment.  See photo above.
  • Next I stamped the sentiment with Versamark ink and added copper embossing powder, then heat set it.  I repeated this step to get a more dimensional look.
  • Stamp the base layers of the stamps in Mocha ink from the Color Fuse Set #3.  I placed the branches randomly, here and there, using the sentiment and pencil line as my guide.

  • Position the second layer of the branches. For this layer I used a variety of inks.  I used Mango, Citrus, and Apricot on the different branches.  The included layering guide makes this very easy!
  • For the final layer, instead of stamping it with inks, I used embossing powder.
  • Make sure all of the inked layers are dry!  Use your anti-static bag, then stamp the third layer with Versamark ink.  I used embossing powders I had in my stash.  One was WOW copper and the other BEE Sweet, a golden yellow shade (and on sale now).  Heat set the powders with your heat tool.
  • Now use the two taped together dies and line the pencil line up with the inside of the rectangle die.  Run it through your die cutting machine.  Be sure to erase your pencil line!

  • I added foam tape to the back of the rectangle piece.
  • I centered it onto a coordinating card base and adhered it.  The card base is from The Paper Cut's Festive Variety Scored Slimline Cards pack.
  • I added liquid glue to the deckled frame and adhered it around the rectangle.
  • To finish it up I added some coordinating sequins from my stash.  I never can have too much bling! Haha!

I loved adding the embossed layer to this card, and I hope I've inspired you to give it a try.  Have a wonderful and crafty week!

Saturday, September 12, 2020

Espresso My Gratitude--Pink & Main with Pear Blossom Press Blog Hop

 Hello friends!  I'm so happy to be part of the Pear Blossom Press and Pink & Main collaboration blog hop!  We are creating fun and interactive projects with some awesome stamps and dies from Pink & Main and the so easy to use EZ-Lights from Pear Blossom Press!

I used the Pear Blossom Press EZ-Lights to create a fun card that lights up the sparkles on the whipped cream topping!  The Pink & Main Need To Venti set is awesome for all of your coffee cards!


Read on for the details to make this fun card!

I began by making my card base.  I added some brown card stock to an A2 card base.  I trimmed a piece of patterned paper (all supplies are listed below) to 4" x 5-¼" and adhered it to the card base.

I stamped the leaves and the acorn several times.  Then I die cut them out with the coordinating dies.  I added Glossy Accents to the acorn tops and set them aside to dry.

Next I created the panel for my lights and images.  I used another piece of the brown card stock trimmed to 4" x 2-½" and added a piece of 4" x 2" patterned paper.

I stamped two leafy cups from Pink & Main's Need to Venti set in Copic safe ink.  I colored one of the cups with my markers.  The colors I used are:  YG97, YG95, YG93, YR27, YR24, YR21, B39, B37, and B23.  I used the coordinating die to cut it out.  I fussy cut the whipped cream from the second cup.  Then I stamped the sentiment from the Need To Venti set with Versamark and and heat embossed it with brown embossing powder.  I adhered the cup to the panel and punched holes for the lights with a 1/8" hole punch.  Then I planned where to place the battery pack of the EZ-Light set from Pear Blossom Press.  I adhered the battery pack with double sided tape.  Next I positioned the wires and lights and kept it all in place with pieces of washi tape.  


I added a double layer of 2mm foam tape to the panel and adhered it to the card front.  I added some small pieces of foam tape to the other whipped cream, making sure I didn't cover the holes and added it to the cup.  I glued the leaves and acorns along the bottom of the panel.  For a bit of bling, I added some chunky glitter to the whipped cream.


Thank you so much for hopping along with us!  For more awesome inspiration, check out all of the stops in the hop and leave a sweet comment along the way!

Here's the full hop list:

Carol Hintermeier <---that's me!

Supplies:

Friday, September 11, 2020

Simon Says STAMPtember & Honey Bee Stamps Exclusive "On My Mind"

 Happy STAMPtember!!!  What is STAMPtember, you may wonder?  Here is Simon Says Stamp's description:

"STAMPtember is a special celebration of stamping that lasts all month long! You'll find special new products, industry collaborations, prizes, supersized ispiration, education and so much more! Join us in celebrating the 11th Anniversary of STAMPtember! This product has been designed to inspire and delight you in making your projects. It's available exclusively at Simon Says Stamp while supplies last."

I'm very honored to have the opportunity to show you their collaboration stamp set with Honey Bee Stamps!  It's called On My Mind and it's so beautiful!!!  This set has many sentiments to use with this beautiful floral wreath that makes it perfect for many occasions!  This is available to purchase as just the stamp set, or the stamp set with the coordinating die.  Read on to see how I created my card!


First I created my A2 card base.  I adhered a piece of Concord & 9th's Dove Gray card stock to a white card base.  Then I stamped Honey Bee's Buffalo Plaid stamp onto some white card stock with Concord & 9th's Dove Gray ink.  I trimmed this to 4" x 5-¼" and adhered it to the card base.

Then I stamped the wreath and sentiment with Versamark ink onto a piece of Strathmore Bristol Smooth card stock. I heat embossed them with silver embossing powder.   Next I used my Zig Clean Color Brush Markers to color it.  I have the colors I used listed below.  I didn't have the die, but it was very easy to fussy cut out.  I added foam tape to the back.

I adhered the wreath onto the card base.  For a bit of bling, I added some Honeysuckle Nuvo Jewel Drops here and there.

I love how this turned out, and I hope you do too! Remember, this set is only available at Simon Says Stamp and while supplies last!  Thank you so very much for stopping by!!


Watercolor markers used:
Zig Clean Color:  Light Green, Yellow Green, Olive Green, Yellow, Gray Brown
Altenew:  Sweet Leaf, Lime, Purple Wine