Pages

Monday, January 27, 2020

New Lovable Animals | Art Impressions

Hello friends!  Today I have two cards using the new Lovable Animals set.  This is an absolutely adorable set that has four cute critters, several accessories for them to hold, and sentiments for each critter.  It even comes with all the dies you need to cut them out.  The dies for the animals cut around their paws/feet so they can hold whatever you'd like to tuck in!  I love how this set has a large heart die to use in various ways.


This first card features the oh, so cute elephant.  Both critters and the accessories are stamped in Copic safe ink and colored with the markers I've listed below.  I used the Rectangle A2 Double Stitched dies to cut a white rectangle, and a red one.  These were layered onto a top-folding A2 card base.  I die cut the heart from the same red card stock and added some white stitching and sparkle with a clear Wink of Stella.  I layered the heart onto a black striped strip and cut off the over hanging part.  The elephant is popped up with foam squares on top of the heart.


I stamped the sentiment in Versafine Onyx Black ink and die cut it with a Tag Stitched die.  I cut a larger red tag to go behind it and tie them together with red gingham ribbon from my stash.  I used foam squares to pop it up.


This next card has the cute kitty with the sentiment made just for him!


After I colored the cat and die cut it out, I worked on the background.  I die cut pink card stock with a Rectangle A2 Double Stitched die and inked on clouds with a cloud stencil and white pigment ink.  This layer adhered to a white rectangle, and this is on a top-folding red A2 card base.  I popped the cat up with foam squares.


The heart he is holding was die cut with an included die.  I added white stitching, clear sparkle, and Glossy Accents.  Once it was dry I tucked it into his paws.

The sentiment was die cut with a Rounded Rectangle A2 Double Stitched die and also popped up.


I love the size of the critters in this set.  They are easy to color and so fun for your Valentine cards.  Be sure to check back next Monday as I will have two more cards using the other two critters in the set.  Have a wonderful, crafty week!

Copic markers:
Elephant card:  C5, C3, C1, RV25, RV25, RV14, RV13,  RV25, RV14, RV13, C3, C1, C00
Cat:  YR24, YR31, YR20, R32, R21, R20, R00, W3, W1, W00

Supplies:
Elephant card:

Cat card:

Sunday, January 26, 2020

Special Joy | Rubbernecker Stamps

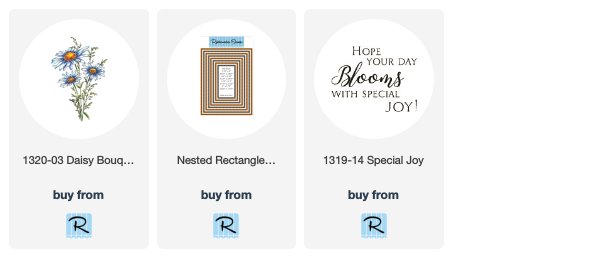
Happy Sunday friends!  I'm on the Rubbernecker Stamps blog today and I have a (what is for me) a clean and simple card using the beautiful Daisy Bouquet #2.  I can't tell you how much I wanted to put some bling on this card!  LOL!  The white space is hard for me to leave alone, but I'm glad I did so that the focus stays on the flowers and the sentiment.


Here are the steps for the floral section.
  1. Stamp the bouquet with Copic safe ink.
  2. Color the background around the bouquet with B02, B04, BO5, and B06.
  3. Add some Copic Various Ink Colorless Blender solution to a small scrap piece of washcloth.  Blot this along the background for 2-3 seconds, drying with a heat tool as you go around.  I love the textured look this technique creates!
  4. Next, I colored the bouquet using these Copic markers: YR23, Y18, Y11, Y08, G07, YG17, YG25, YG03.
  5. Trim the colored panel to 4" x 2-¼" and adhere it to a black card stock layer that is 4" x 2-½".
  6. Die cut using the largest Nested Rectangle Sm. Stitch die by just cutting the top and bottom edges.  This way the piece will have the same stitching as the card base.  (See the next photo.)


Card base:
  1. Adhere a 5-½" x 4-¼" black panel to a white top-folding card base.
  2. Die cut white card stock with the largest Rectangle Stitched die and adhere to the card base.
  3. Stamp the Special Joy sentiment with Versafine Onyx Black ink.
  4. Add foam tape to the back of the floral piece and adhere to the card base.

Thank for stopping by today!  Have a great week, and happy crafting!

Saturday, January 25, 2020

Keeping Christmas Blog Hop | Wplus9 Winter Sparrow

Hello friends!  I'm very happy to be joining a talented group of ladies for a monthly blog hop that's all about making Christmas cards year round!  The hope is that by making Christmas cards each month, by the time December rolls around, we will have a good start on our Christmas card stash!  I have the complete list for the blog hop at the end of this post.


For my card today, I'm using the beautiful Wplus9's Winter Sparrow and the Pine Frame Die.


This card is very easy to make.  The hardest part for me is choosing what colors to use!


The details: (A complete supply list is at the end.)

  1. Adhere green card stock to a top-folding A2 card base.
  2. Die cut the Pine Frame die from 80# Neenah Solar White card stock and adhere it on top of the green layer.
  3. Stamp your sentiment onto the center of the Pine Frame.
  4. I made several of these cards, so I created a "jig" of sorts by placing the dies for the birds and branches onto a piece of white card stock and running it through my die cutting machine.
  5. Continue cutting out as many birds and branches as you think you will need.
  6. Place the jig into your MISTI and secure it with some removable tape.
  7. Now place the die cut pieces into the opening and stamp with your desired colors.  I used a variety of ink brands and I've listed them at the end of this post.
  8. I used a few Copic markers to add some shading on the birds.
  9. Arrange the branches and birds and adhere with liquid glue and/or foam squares.
  10. Add Stickles in Christmas Red to the branches.  It doesn't show in the photo, but I used a clear Wink of Stella to add some sparkle to the Pine Frame.  

I hope you've enjoyed my card today.  Be sure to subscribe in the box in the left column so you won't miss the monthly Christmas card inspiration!  Thanks for stopping by!

If you need to start from the top, click the link for the amazingly talented Kelly!

Kelly Lunceford (Creator)
Carol Hintermeier << Me!

Supplies:
Wplus9 Winter Sparrow stamps and dies
Wplus9 Pine Frame die
Wplus9 Most Wonderful (for the sentiment)
Stickles Christmas Red
Wink of Stella clear

Inks I used:
branches: Gina K. Designs Jelly Bean, Altenew Evergreen
birds:  Simon Says Stamp Sparrow & School House red, My Favorite Things Kraft

Thursday, January 23, 2020

Fluttering Hearts | Honey Bee Stamps

Happy Thursday friends!  Today I've used Honey Bee Stamps Fluttering Hearts and Fluttering Hearts Pierced cover plate dies and made three cards with one main die cutting.


I didn't really plan on making three cards, but once I had this idea, I just kept going!  I started out making this card first.


Here are my steps to make this card:

  1. Using an ink Blending Brush, blend Seedless Preserves, Picked Raspberry, and Spun Sugar Distress Oxides onto an A2 sized white card panel.  Die cut this piece with the Fluttering Hearts Pierced Cover Plate die.
  2. Die cut 80# Neenah Solar White card stock with the Fluttering Hearts Cover Plate die.  NOTE:  While this is still on the cutting plate, place a piece of Press N Seal over the entire piece to keep all of the little hearts in position.  Press firmly, then carefully remove the die cut, leaving the hearts on the Press N Seal.
  3. Adhere the Fluttering Hearts die cut onto the inked Fluttering Hearts Pierced layer.
  4. Ink a small piece in the same Distress Oxides, then die cut the top layer from the Heart Honey Cuts.  I cut the middle and bottom layers from 80# Neenah.  I added some clear Wink of Stella to the middle layer and adhered all three layers with liquid glue.  Stamp the rest of the sentiment from the Heart stamp set with Versafine Onyx Black ink and cut into strips.  Add foam tape to the back.
  5. Die cut three bows (Mason Jar Card Honey Cuts).  Ink one in each of the Distress Oxides used above.  I glued them together, slightly offset.
  6. Stamp, color and die cut the lollipop and cake pops from the Sweet Treats stamp and Honey Cuts.  Arrange them and adhere together, then add the bow.  Add a few small foam strips/squares to the back.  I added some Glossy Accents to the lollipop and candy bits for some shine!
To finish, I arranged the elements and adhered them to the card base.  I love how beautiful the Fluttering Hearts are!


This next card is where I used all the little hearts leftover from the first card.


I ink blended another panel with the same Distress Oxides and adhered all the hearts.  This was easy as the hearts were still on the Press N Seal.  I just added dots of liquid glue to each one and then flipped it over onto the card layer.  As pretty as this was, I decided to die cut a heart window.  I had already adhered the panel to an A2 card base though. I used the smallest heart from the Pierced XOXO Hearts dies, and I did need to run it through my machine several times for it to cut all the way through.

I die cut another Pierced Heart from Neenah Solar White and stamped the sentiments from the Kisses stamp set in Onyx Black ink.  For the Love, I used a bit of Seedless Preserves and Picked Raspberry Distress Oxide.  With the card closed, I adhered this heart through the window onto the inside of the card.


I love how this adds so much to the inside of the card while leaving plenty of room to write a personal note inside.


Of course, I couldn't let the die cut heart from the previous card go to waste!  Here is the final card I made that began from the one die cut of the Fluttering Hearts Cover Plate.


This was very quick to make.  I die cut one Fluttering Hearts Pierced Cover Plate from a piece of 80# Neenah.  Attach that to an A2 top-folding card base. Die cut one more heart from black card stock and glue it to the back of the heart, slightly offset.  I added some thin foam tape to the back of the heart and attached it to the card. I like how the black offset helps the heart to stand out better from the white background.

I stamped the sentiments from the XOXO stamp set and cut them with the coordinating Honey Cuts.  Use the dies and cut some black card stock, adhere these to the sentiments, again, offset.  I added some foam strips to the back and attached them to the heart.  Done!


Thank you for stopping by today!  I hope I've inspired you to use a special die and see how far you can make it go!  Have a wonderful, crafty day!

Supplies:
Honey Bee Stamps:

Other:
Copic markers for cake pops/sucker:  RV55, RV02, E57, E55, E53, C3, C1, C00

Monday, January 20, 2020

Valentine Wishes | Art Impressions

Happy Monday friends!  I have another card for Art Impressions using the Holiday Mansion set and the HM Valentine set.  Love is in the air and all around this sweet house!


As usual, I stamped the images from both set in Copic safe ink and colored with the markers listed below.  For the house, I used a brick stencil, a tiny ink blending brush and Worn Lipstick Distress Ink.  I just used pieces of Post-it Tape to mask off the areas I didn't want stenciled.  Next, I fussy cut the house out.  I used the coordinating dies to cut out the other images.


For the background of the card, first I used a cloud stencil, an ink blending brush and Spun Sugar Distress Ink.  Then, keeping the cloud stencil in place, I placed a heart stencil over it and inked some Worn Lipstick Distress ink over that.  I repeated those steps for each cloud layer.  I used a grass stencil and Mowed Lawn Distress ink at the bottom.  I glued this layer to a top-folding A2 card base.


I adhered the bear, flower pot, sign, and weather vane to the house.  Then I added foam tape strips to the back of the house and applied a scrap piece of white card stock so that the clouds won't show through the house openings.  Next, adhere the piece to the background.  I arranged the other pieces and attached them with either liquid glue or foam squares.

I stamped the sentiment onto red card stock with Versamark ink, added white embossing powder and heat set it.  I used a Flag Double Stitched die to cut it out.  To make the flag die fit the sentiment better, I did some partial die cutting as shown in this next photo.  I popped it up onto the card with foam squares.


For the finishing touches (because I just think Valentine cards can be all about the sparkle and shine) I added sparkle with a clear glitter pen and some shine with Diamond Glaze.  Before adding the Glaze, I used a white gel pen to add accents on the hearts.


Thank you so much for stopping by!  Have a wonderful, crafty week!


Copic markers:
C3, C2, C0, E39, E25, E23, 
R39, R37, R35, RV25, RV23, RV21, RV13,
T5, T3, T2, T0, YG25, YG03

Supplies:
Distress Inks:  Spun Sugar, Worn Lipstick Mowed Lawn

Thursday, January 16, 2020

Shades of Pink Challenge | Art Impressions

Hello Ai friends!  It's the beginning of a new challenge over on the Art Impressions' blog.  The challenge is called Shades of Pink!  For inspiration,  Today I have a card using the oh, so adorable new Sending Love Cubbies.  This set has so many images that can be used together or separately!


I love the interactive features of the mailbox!


I stamped the images in Copic safe ink and colored them with the colors listed below.  I used the coordinating dies (Yes! there are dies!) to cut them out.  Notice the slit in the bunnies apron where you can tuck in whichever little elements you'd like!  Using an ink blending brush, I inked up a grassy piece with Twisted Citron and Mowed Lawn Distress Oxide inks.  I adhered the pieces in the mailbox and added a small brad to the arrow to attach it to the side.  I adhered it all to a piece of Neenah I die cut with a Rectangle Double Stitched die.  This is all on a top-folding A2 card base.


I stamped the sentiment in black ink and die cut it with a Flag Double Stitched die.  To create the red layer I set the die on a piece of red card stock and traced around the outside of it with a pencil.  I used scissors to cut it and adhered it to the sentiment piece.  Add a few foam squares to the back to pop it up.


This little bunny is so sweet and I had so much fun playing with the pieces and parts for this card.  Thank you for stopping by and taking a look!  Happy crafting!


Copic markers:
mailbox:   R56, R37, R35, R43, C00, C1, C3
heart box, bow, heart: R56, R37, R35, R43
square present:  BG11, BG32, BG34, BG49, C00, C1, C3
rabbit:  BG11, BG32, BG34, BG49, E34, E51, E53, E55, R00, R20, R21, R32, C00, C1, C3

Monday, January 13, 2020

Pand-Tastic Set | Art Impressions

Happy Monday friends!  I'm on the blog at Art Impressions today and have a sweet card using the Pand-tastic Set along with the exclusive Art Impressions and Scrapbook.com Hydrangeas set.  I love pretty coffee mugs and I decided to make this one with some pretty hydrangeas!


I started out by stamping the panda in the cup onto a Post-It Note and fussy cutting it out as the photos below show.  (The oval mask is there because I originally thought I might do a bit of inking, but changed my mind).  I then stamped the panda onto Neenah 80# card stock in Copic safe ink.  I placed the masks and stamped a portion of the hydrangea onto the cup.  I removed the mask and colored it all with the Copic markers listed below.


I used the Rounded Rectangle Double Stitched Dies to create my shaped card.  I took a top-folding A2 card base and placed the largest die over it with the top edge of the die just beyond the fold.  This way when you run it through your machine, everything cuts except for the very top edge.  Next I added a strip of black and white striped paper to the center.  I used some black ink and stamped the sentiment that's included in the set.


I adhered the layers to the card base.  I also added foam tape to the back of the main image and popped it up onto the blue panel.  I added a few crystal clear hearts to embellish it a bit.


I think this little panda is totally adorable and I love the floral cup!  Thank you for stopping by today.  Have a wonderful, crafty week!


Sunday, January 12, 2020

Birthday Wishes | Rubbernecker Stamps

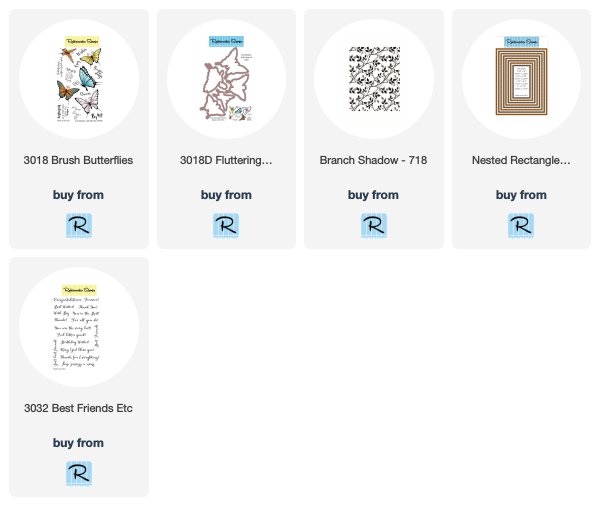
Hello friends! I'm so thrilled to have my first card for Rubbernecker Stamps today!  One thing about me that you may notice over time is that I love flowers, butterflies, and all things nature related.  I had a lot of fun creating this birthday card using the Branch Shadow stamp and the Brush Butterflies and coordinating butterfly dies!  I also used the Nested Rectangle Small Stitch Die set and the Best Friends, Etc. sentiment set.


Here are the steps for the background.
  1. Die cut a piece of Neenah 110# Felt Ultra White Watercolor Paper using the third largest rectangle die.
  2. Tape this piece down using removable tape.  (I like the blue removable painter's tape.)  Since I was using my MISTI, I taped each edge of the panel to the MISTI so that there would be a white border.
  3. Add Tumbled Glass Distress Ink using an ink blending brush and a light hand.
  4. Position the Branch Shadow stamp on the MISTI door and apply some light green ink to the stamp.  Mist lightly with water and stamp onto watercolor paper.
  5. Use a darker green watercolor marker and "color" onto the stamp's branches and part of the leaves.  Mist lightly with water and stamp.  Repeat this step as needed until you like the look.
  6. Dry the panel with a heat tool.  I kept it about 12" away so as not to warp it (or ruin my MISTI!).
  7. Ink the stamp again with the light green ink and stamp.  This will bring back some of the details and crisp edges.  Repeat, if needed.


Steps for the butterfly and sentiment:
  1. Stamp the butterfly in Copic safe ink and color.  I used V17, V15, V12, Y19, Y15, and Y02.
  2. Die cut with the coordinating butterfly die.  While you have the butterfly die out, die cut two more from vellum.
  3. Stamp the sentiment in black ink.  Then use a paper trimmer to cut into a strip.  To get the stitching on the edges of it and the green layer behind it, I used the fifth largest die for the sentiment and the next size larger for the green layer.  The photo below will explain how I did this.  Just run it through your die cutting machine to add the stitching.
  4. Adhere the sentiment to the green layer and add some thin foam tape to the back.


Card layers:
  1. The card base is an A2 top-folding card from light green card stock.
  2. Use the largest stitched die and die cut a piece of the 110# Neenah Felt watercolor paper.  Adhere it to the green card base.
  3. Cut another piece of green card stock with the second largest die and adhere it to the watercolored panel.  Add foam tape to the back of the piece.  Adhere it to the card base.
  4. Add some adhesive only down the middle of a vellum butterfly and adhere the other on top. Next adhere the colored butterfly on top.  Once dry, slightly bend the wings up.
  5. Adhere the butterfly to the watercolored panel.  Add the sentiment piece.
  6. Add some sparkle to the butterfly with a clear glitter pen.  Finish with a "butterfly trail" of NUVO Glitter Drops Lilac Whisper.  


This card was easy and quick to make!  I need to make some more for my birthday card stash.  Do you make cards to keep on hand?  Thank you so much for stopping by today!  Stay crafty!

Thursday, January 9, 2020

Pocket Full Of..... | Honey Bee Stamps

Hello my friends!  Have you seen the new Honey Bee Stamps Bee Mine release?  There are SO many awesome stamps and dies in the release.  It's not just for Valentine's Day as you can see from my card today.  I've used one of my very first Honey Bee Stamps purchases with several of the new products.  I'll always be amazed at how timeless Honey Bee's products are!

My card today features the Stacking Pocket Honey Cuts and the sweet pig from the Bad Influence set.  I used a couple of these dies to create a pocket with an insert.  Here is what it looks like when you take it out of the envelope.


Start pulling the insert out of the pocket card:


Fully opened reveals the most adorable piggy ever:


I think the easiest way to describe how I made this is to list the steps for you.
  1. Using the largest Stacking Pocket die, cut one piece of denim paper (from the Sweet On you 6x6 paper pad) and one from white card stock.  The white piece will be the back of the pocket.
  2. Use the flap die from the Pocket Full of Love die set and cut one flap from denim paper that's about 2-½" wide.  Use the coordinating stitched die to add the stitching detail.  Use a white gel pen to add stitching along the pocket and flap.
  3. Stamp and color a bunch of flowers and leaves from the Busy Bee set and cut out with the coordinating Honey Cuts.  The petals are Y15 and Y11 Copic markers.  The centers are YR18, YR16, and Y18.  The leaves are YG17, YG25, YG03.  Stamp, die cut and color several bees.  Stamp and color the pig from the Bad Influence set and cut it out with the coordinating die.
  4. Stamp, in black ink, and die cut the sentiment from the Pocket Full of Love.
  5. Stamp, color and die cut the button (same colors as the leaves.)  I used two strands of white DMC embroidery thread to add stitching on the button.
  6. Adhere the denim pocket to the white pocket back.  I used just a thin line of liquid glue along the edges--do NOT glue the top edge. :)
  7. Arrange the flowers to your liking.  I used foam squares to pop some of them up.


Pocket insert:
  1. Die cut  a 6" x 5" white card stock with the second largest Stacking Pocket die.  NOTE:  I did a partial die cut by not cutting the top edge.  Then trim the sides to match the die cut piece.  For my little scene I needed this to be about 5-½" tall.
  2. Stencil Tumbled Glass Distress Ink using the cloud stencil from the Outdoor Scene Builder stencil set.  I used a Background Blender brush to keep the ink light.
  3. Adhere the denim flap to the top of the insert.  Glue ONLY the top edge!
  4. Stamp the Happy Birthday sentiment (from Pocket Full of Love) with black ink.  I did some "stamp surgery" to the sentiment to be able to fit it where I wanted it.
  5. Arrange the flowers, button, bee, piggy and sentiment along the bottom and pocket flap.  I used liquid glue to stick all of these on. I did use foam squares to pop up the sentiment.


It barely shows in the photos, but I did add some sparkle with a clear glitter pen to the flowers and bees' wings.


I totally love this Little pig and I know this won't be the last time it's on a card!  Thank you so much for stopping by!  I appreciate you!  Happy crafting!


Supplies:
Honey Bee Stamps:
Stacking Pocket Honey Cuts